VS Code配置Python环境
省流:在VS Code工作区里直接开整,launch.json有需要再配置。
上回说到
先安装Python,如果还没安装好,具体可以参考这篇文章。本文还是以Python 3.12.2为例。
前排提醒
如果有数据分析、人工智能等特定领域的需求,建议安装一年以前的版本,因为最新版本可能有些包不支持。
Windows
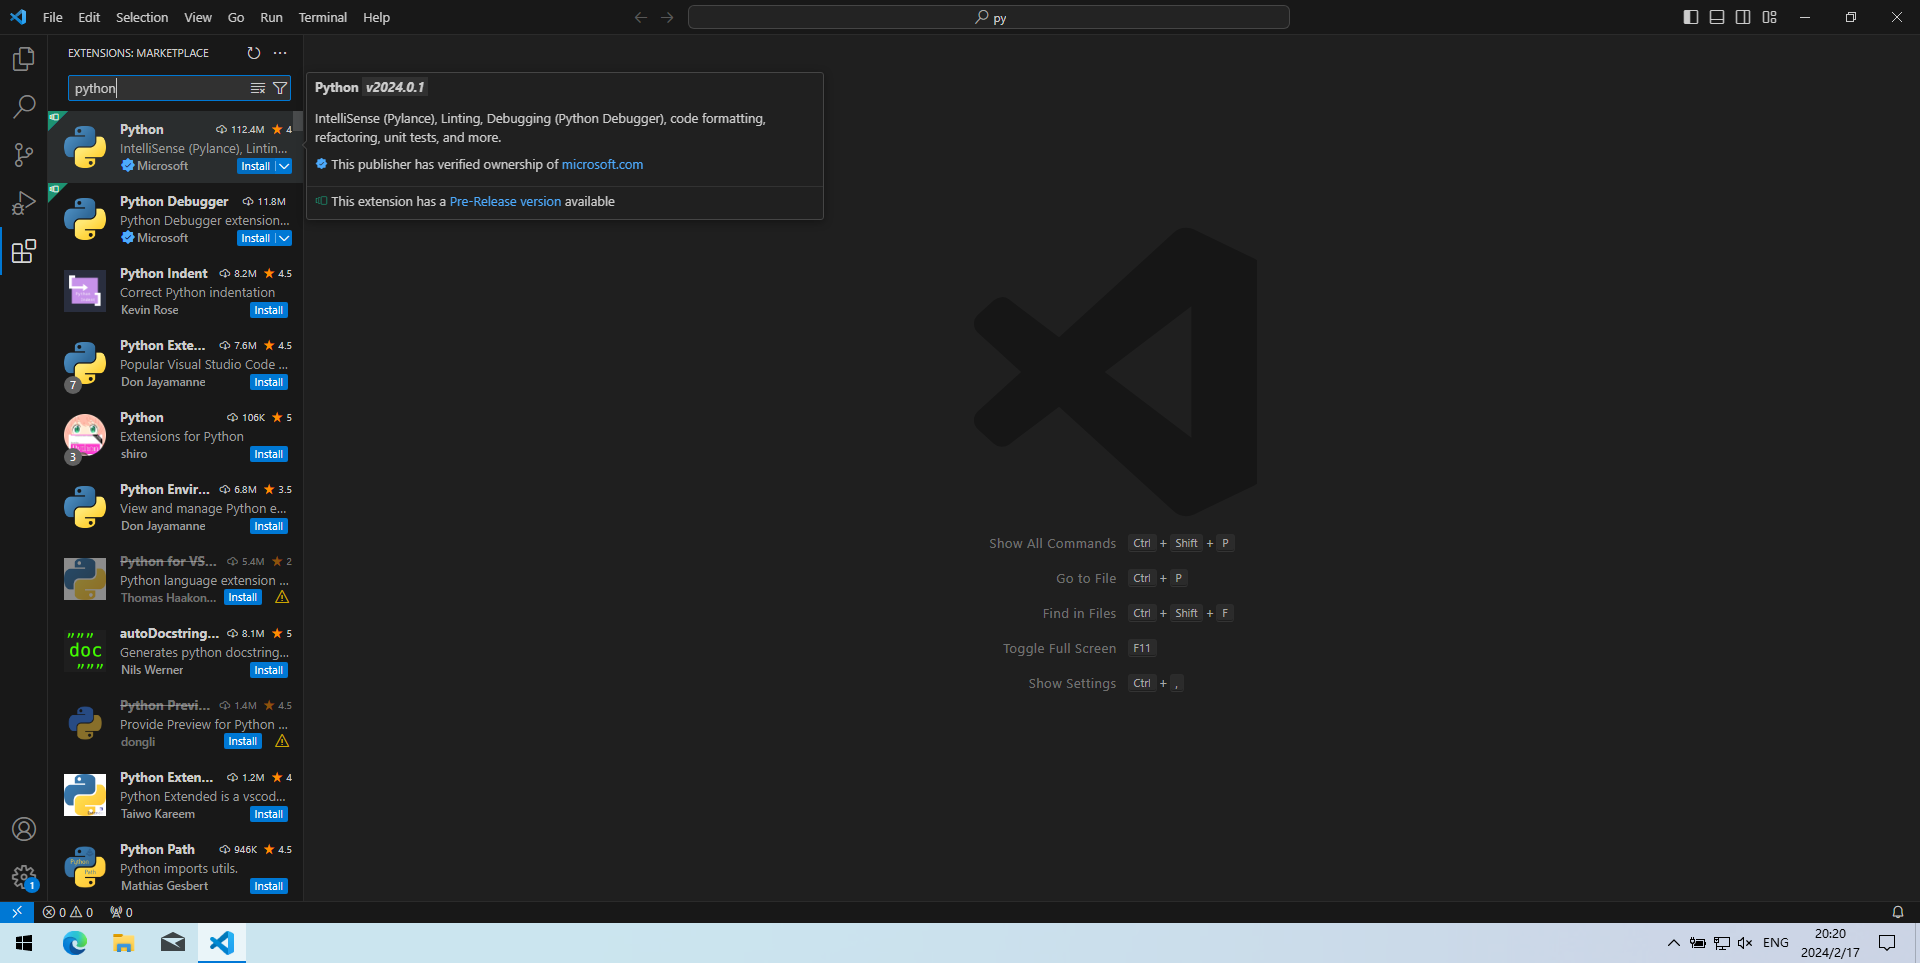
- 打开VS Code,按Ctrl+Shift+X键,搜索“python”插件并点击“Install”安装。
- 按Ctrl+K Ctrl+O“打开文件夹”(Open Folder),选择或新建一个文件夹,作为写Python程序的工作区(workspace)。这里以
C:\Users\vboxuser\Documents\py为例。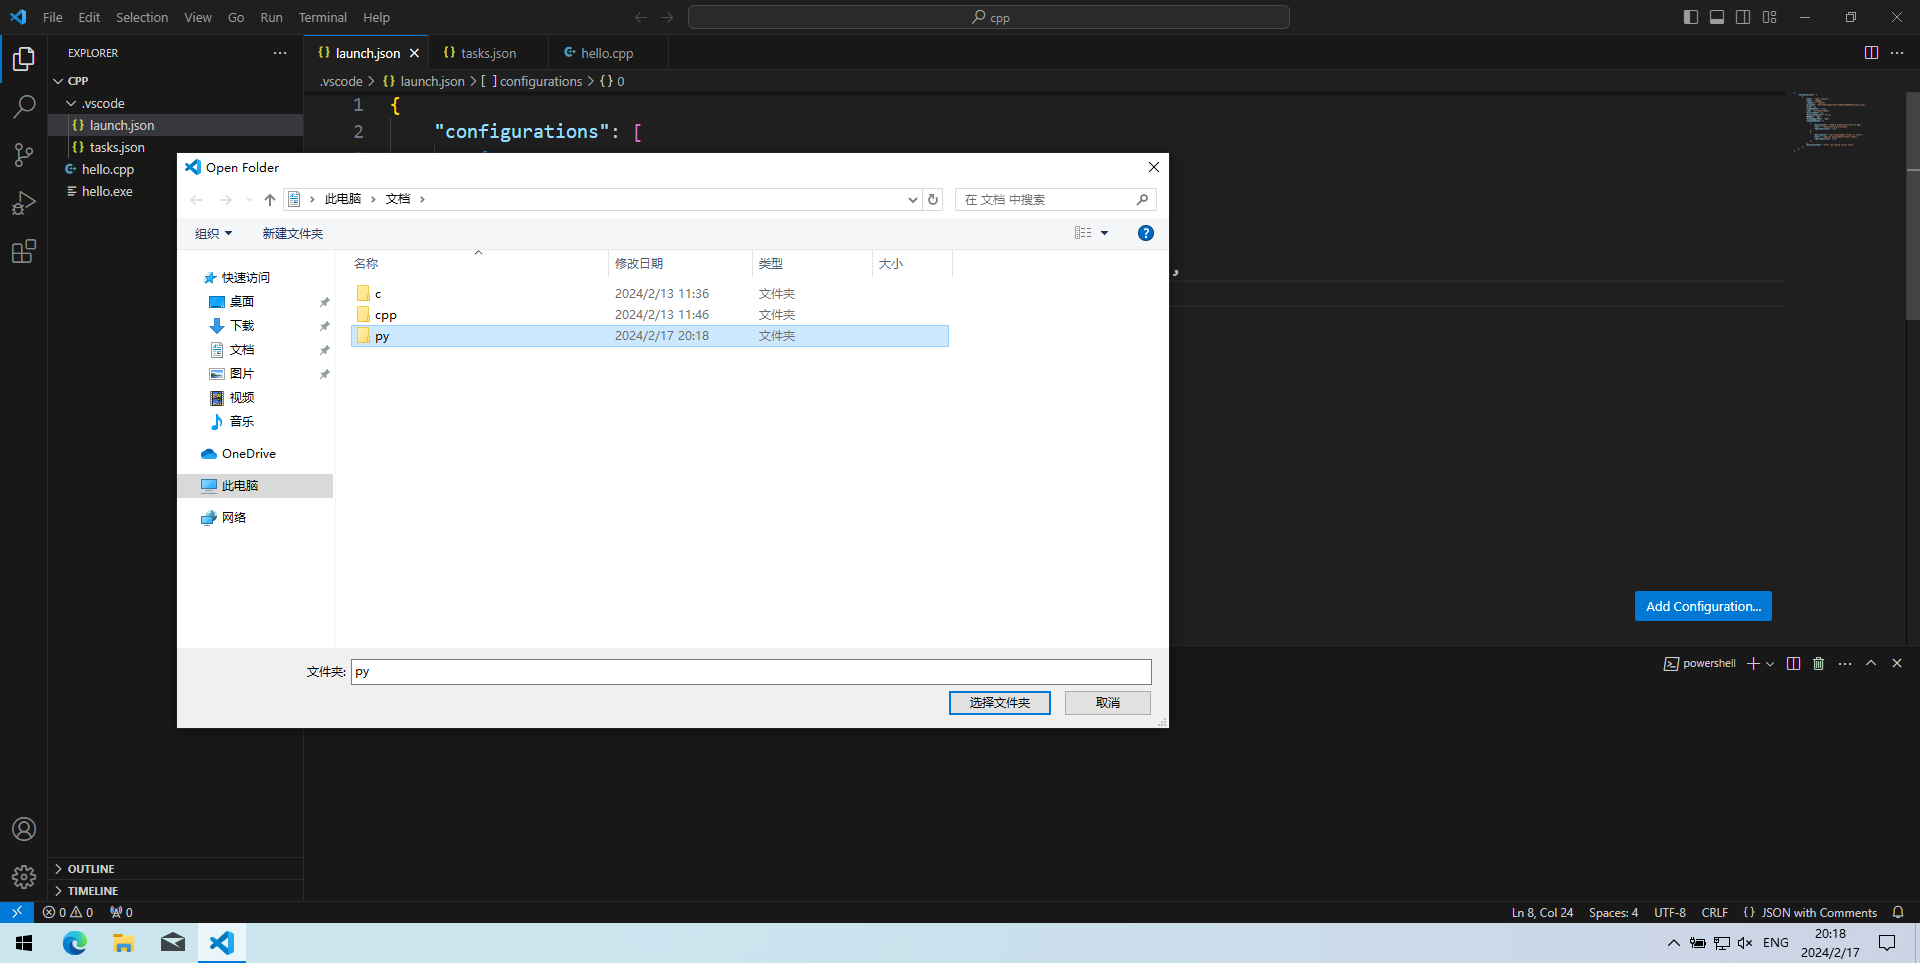
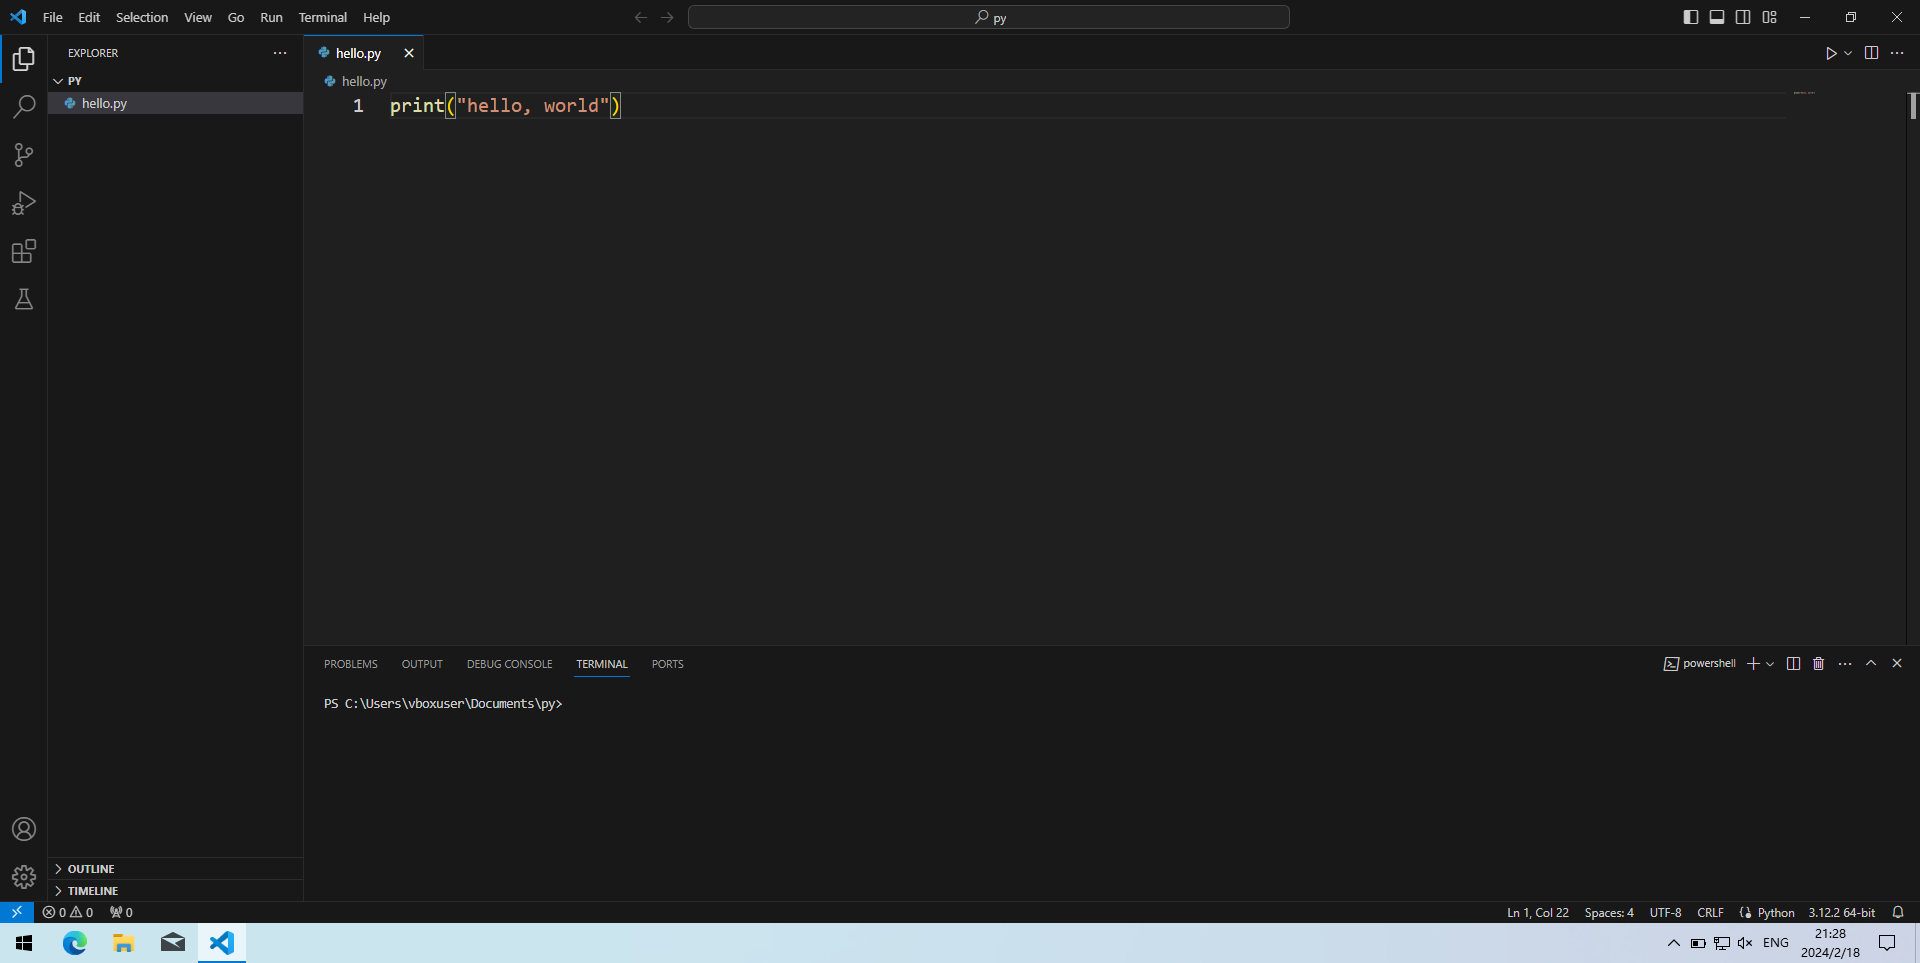
- 在工作区或其子文件夹新建一个文件
hello.py,随便写点东西,比如然后按Ctrl+S保存。1
print("hello, world")
- 按F5(或Fn+F5,下同)调试程序。页面上方会让用户选择调试配置(Select a debug configuration),通常选择默认的第一项“Python文件”(Python File)就行。
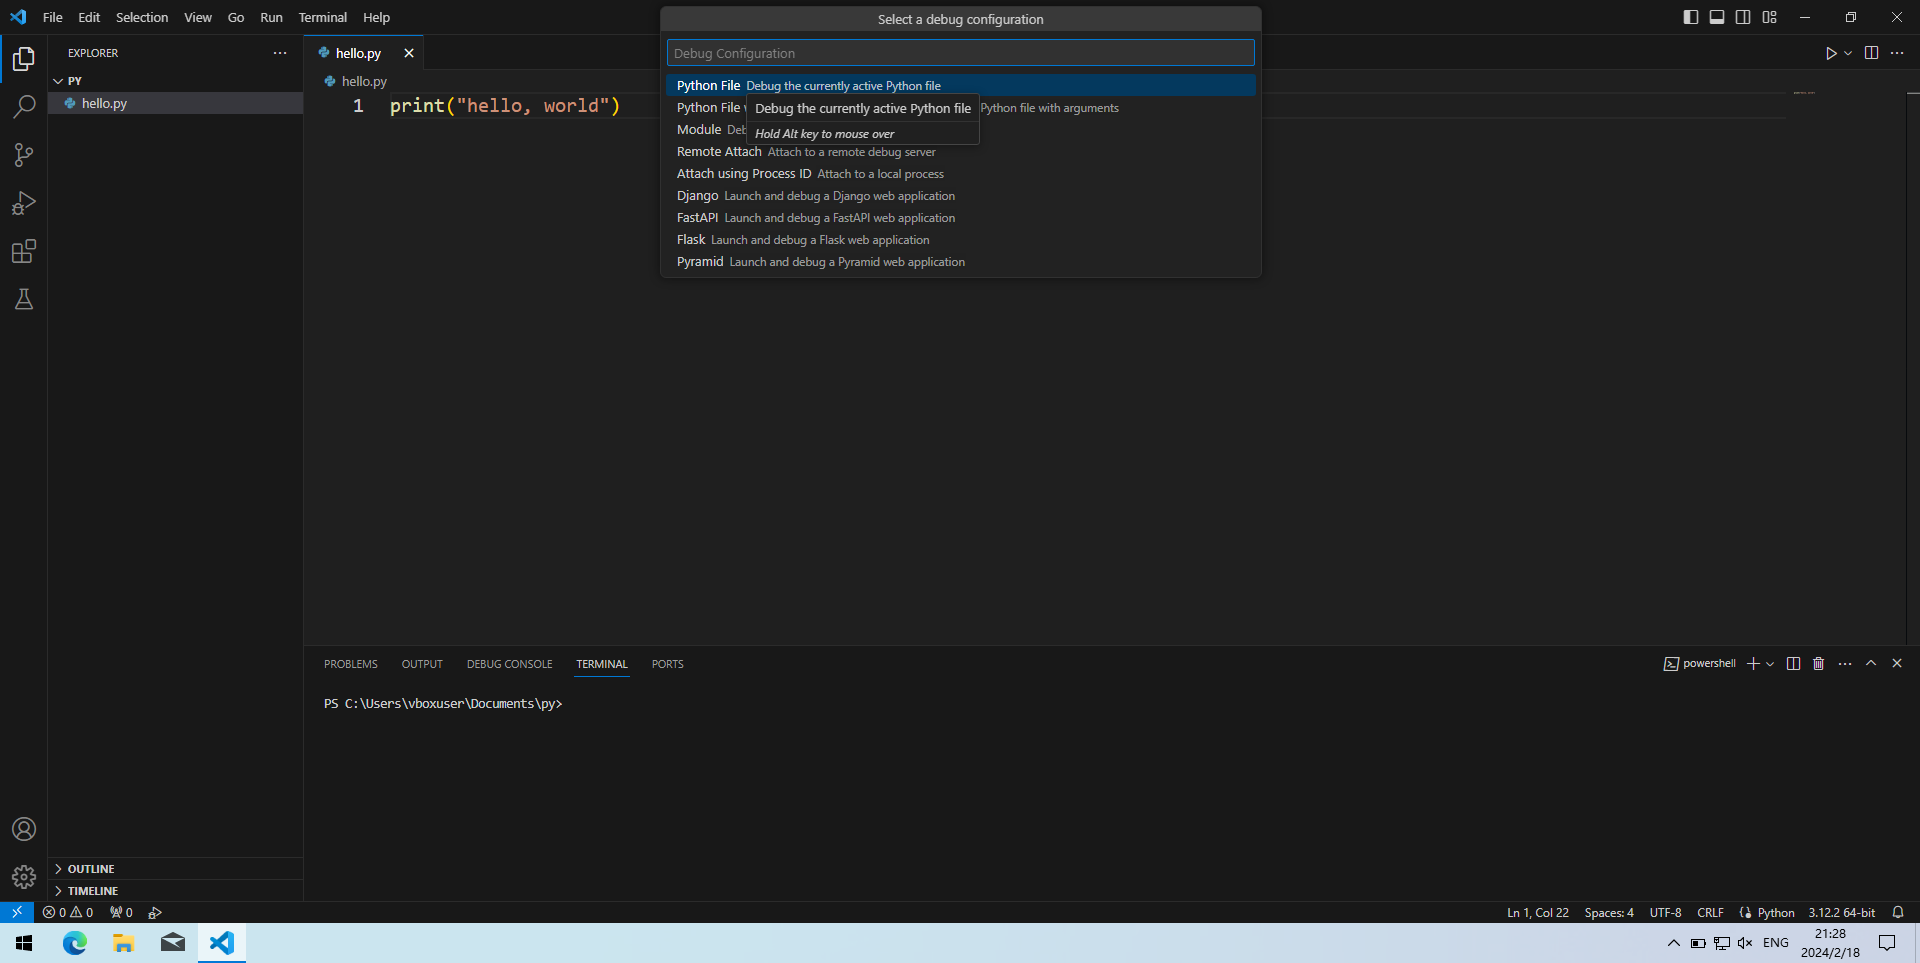
- 然后看到下方终端(Terminal)输出
hello, world,则环境配置成功。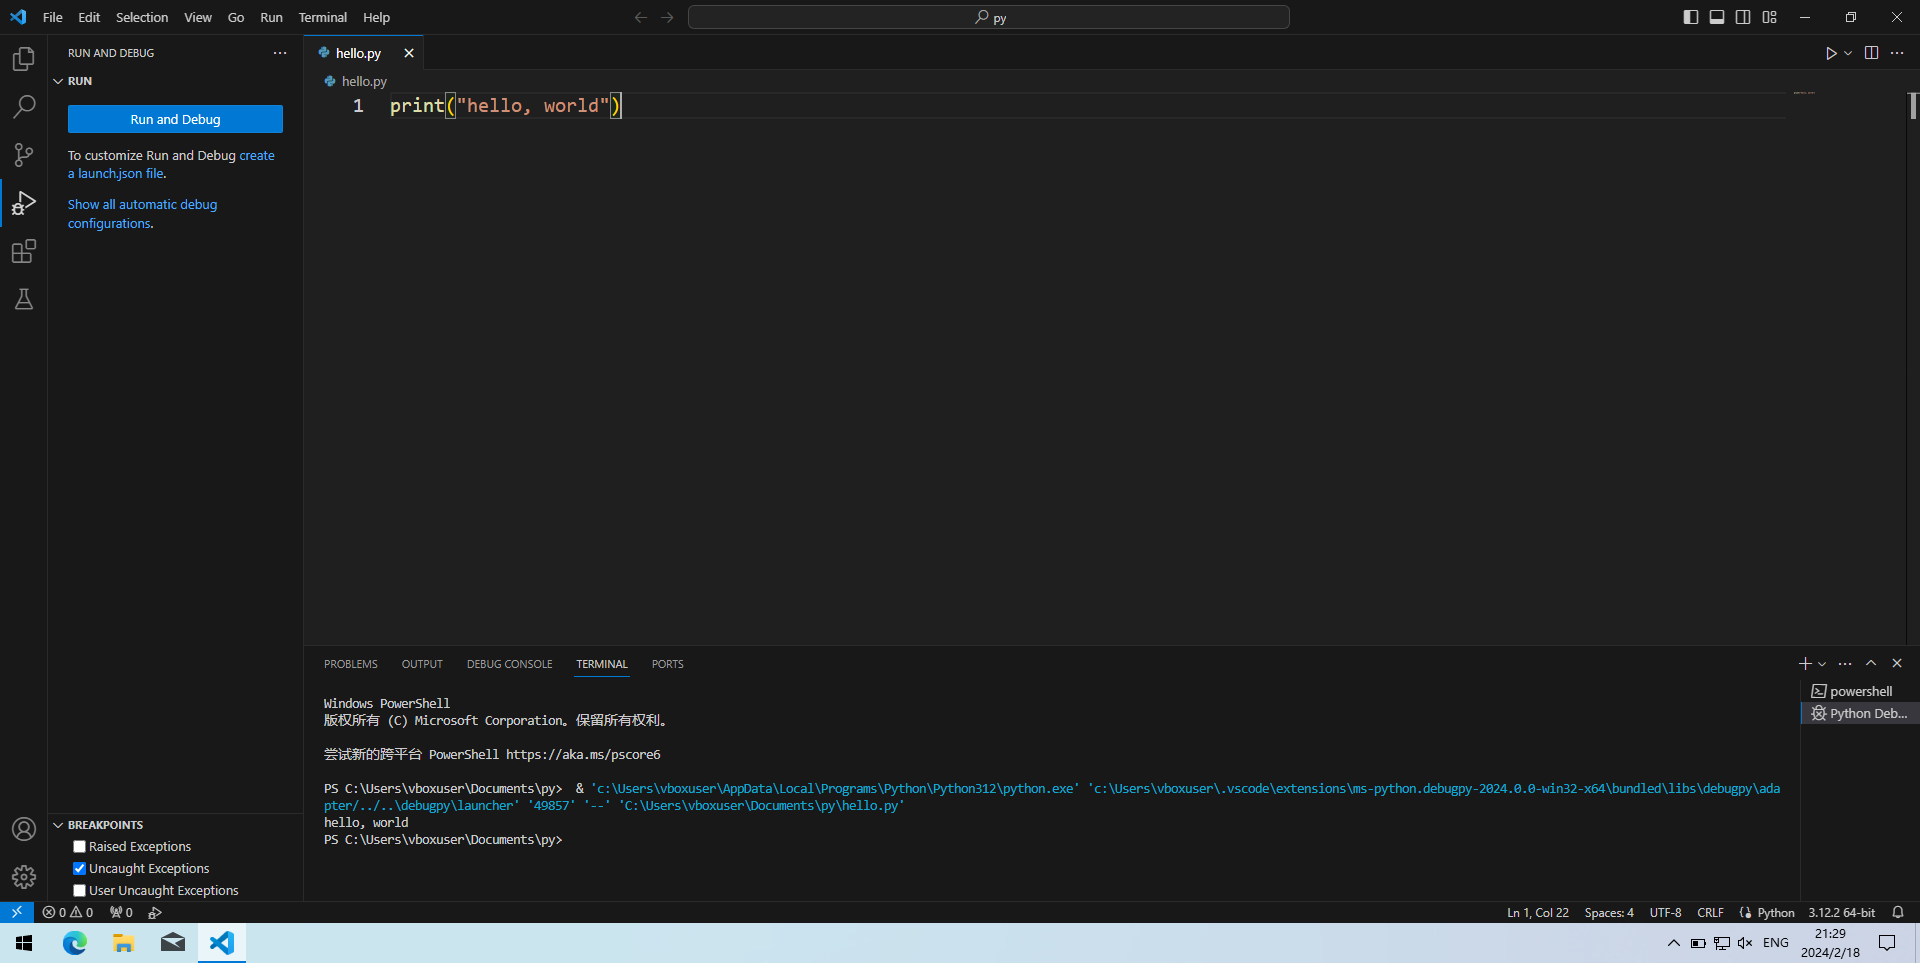
Linux
- 打开VS Code,按Ctrl+Shift+X键,搜索“python”插件并点击“Install”安装。
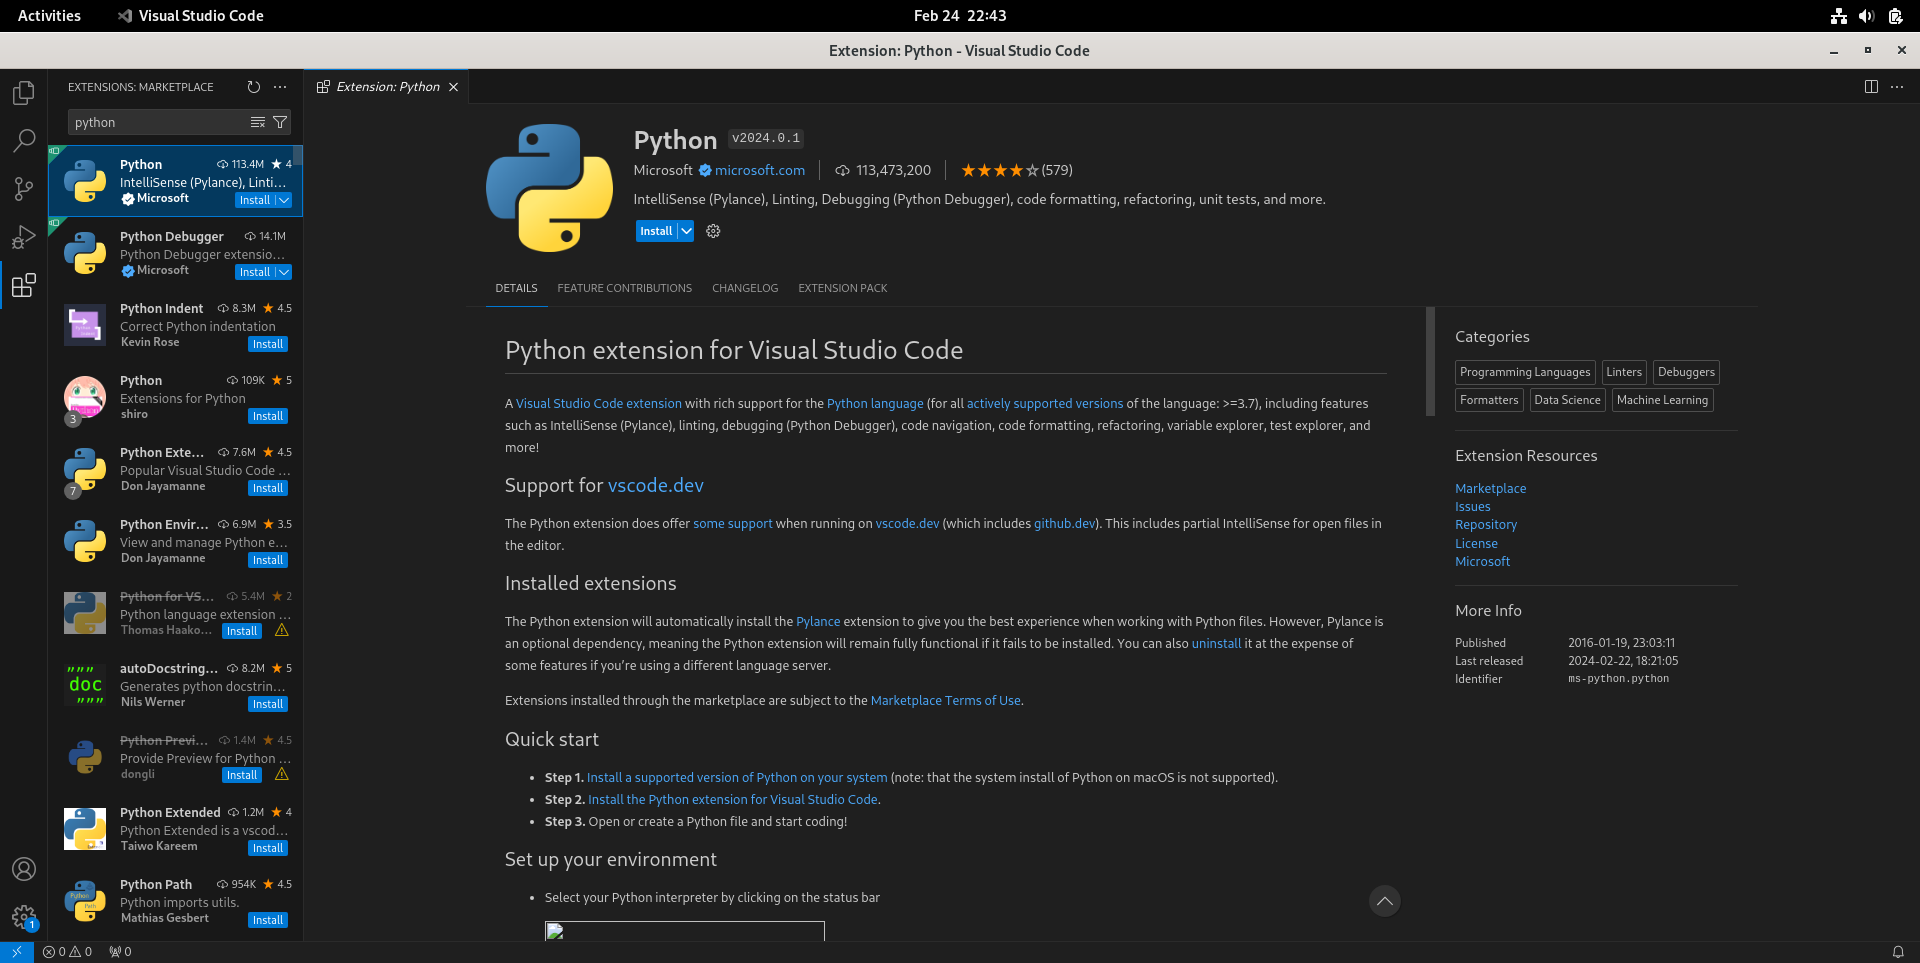
- 按Ctrl+K Ctrl+O“打开文件夹”(Open Folder),选择或新建一个文件夹,作为写Python程序的工作区(workspace)。这里以
~/Documents/py为例。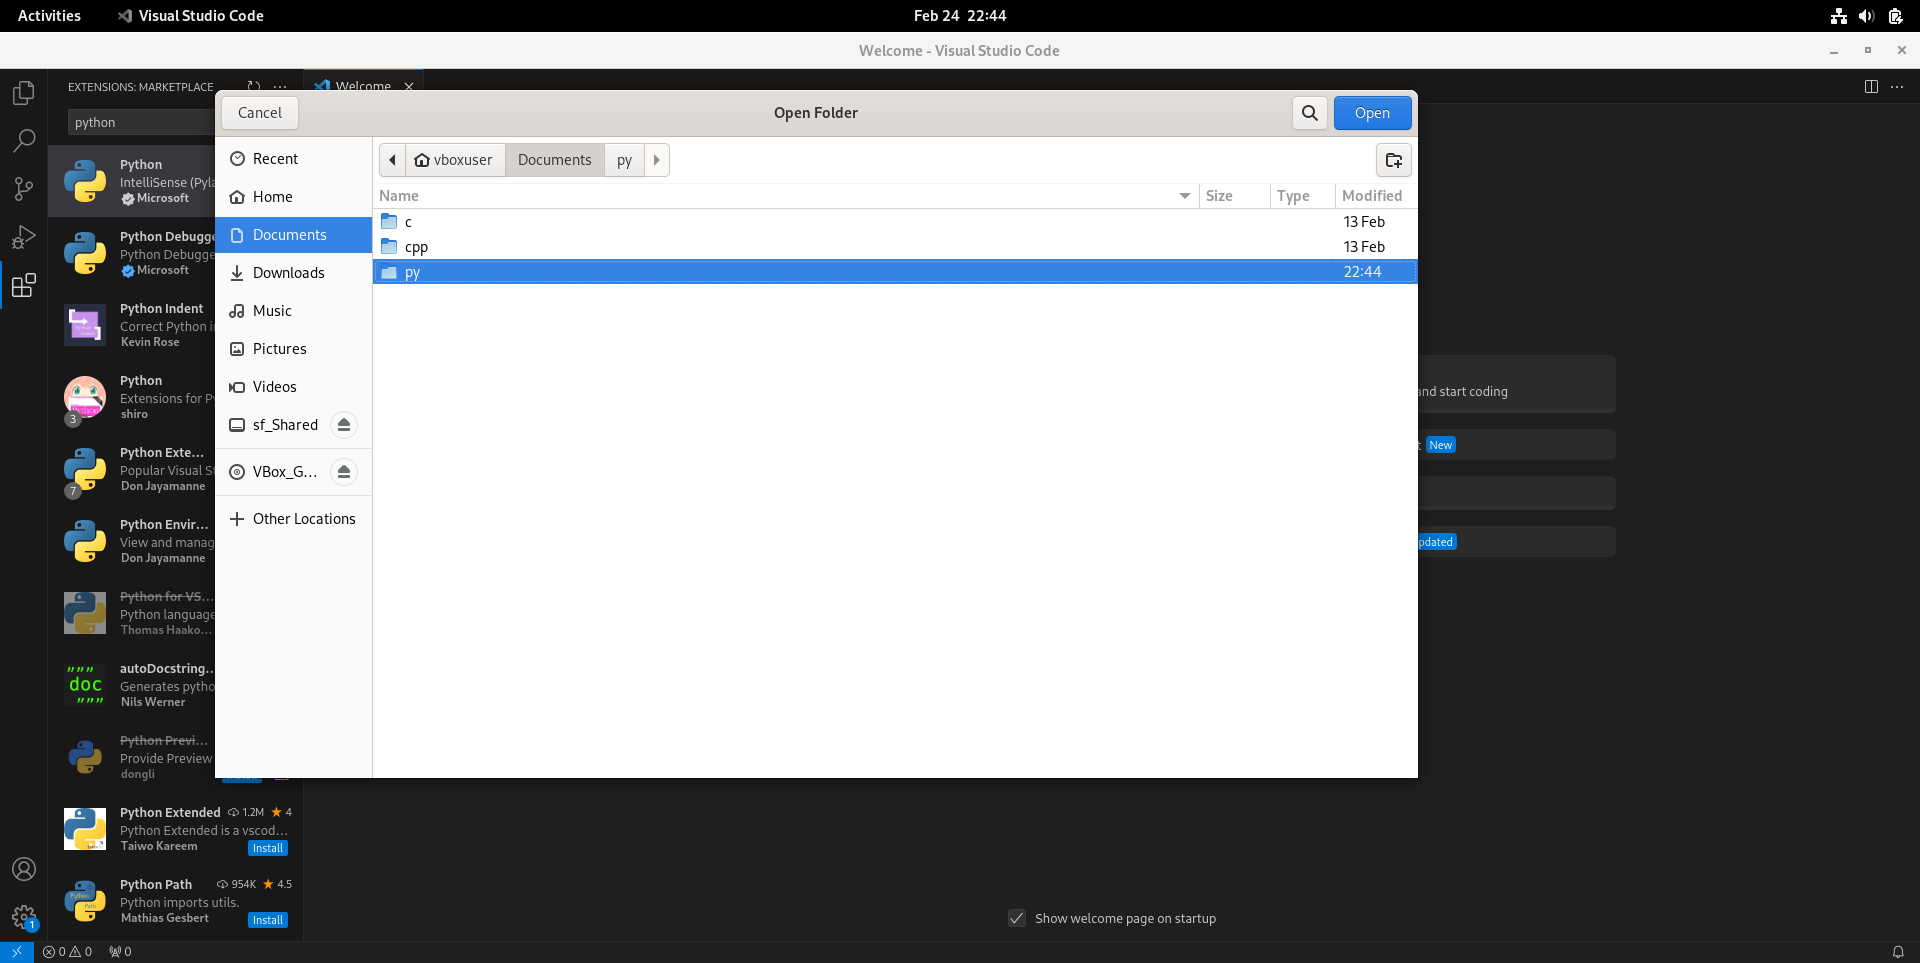
- 在工作区或其子文件夹新建一个文件
hello.py,随便写点东西,比如然后按Ctrl+S保存。1
print("hello, world")
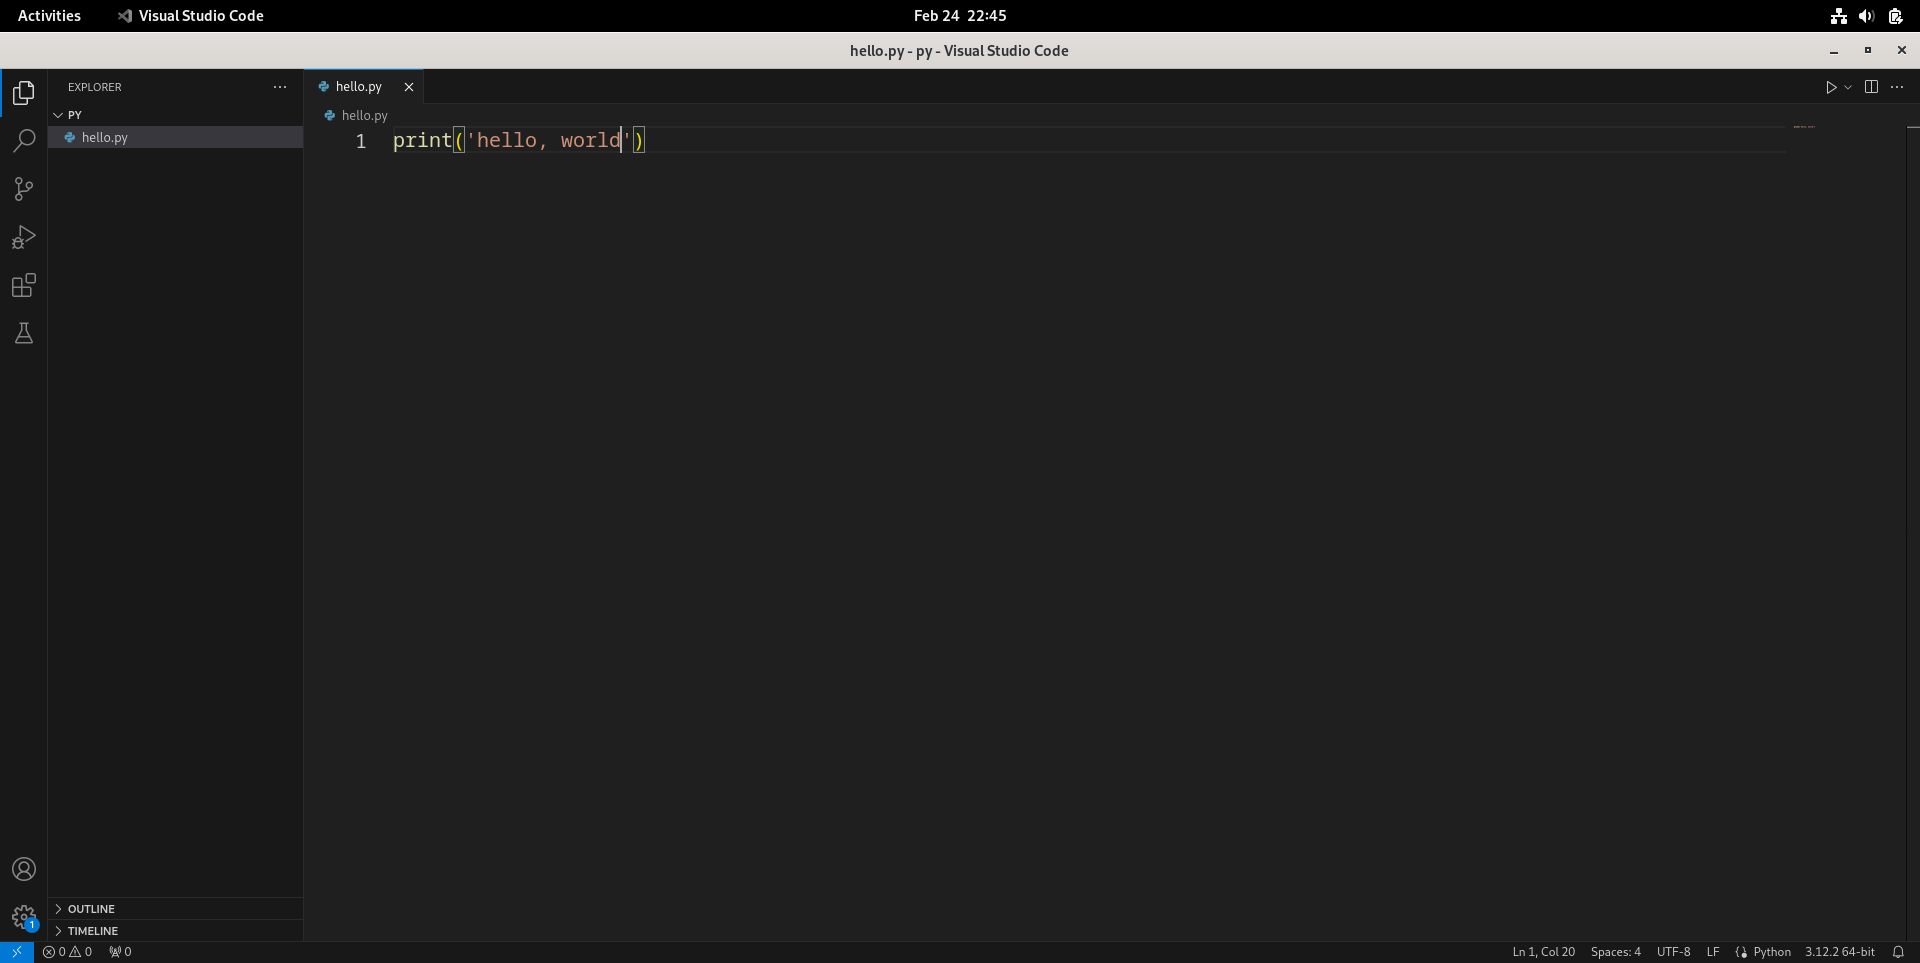
- 按F5调试程序。页面上方会让用户选择调试器(Select debugger),这里只有一项“Python Debugger”。
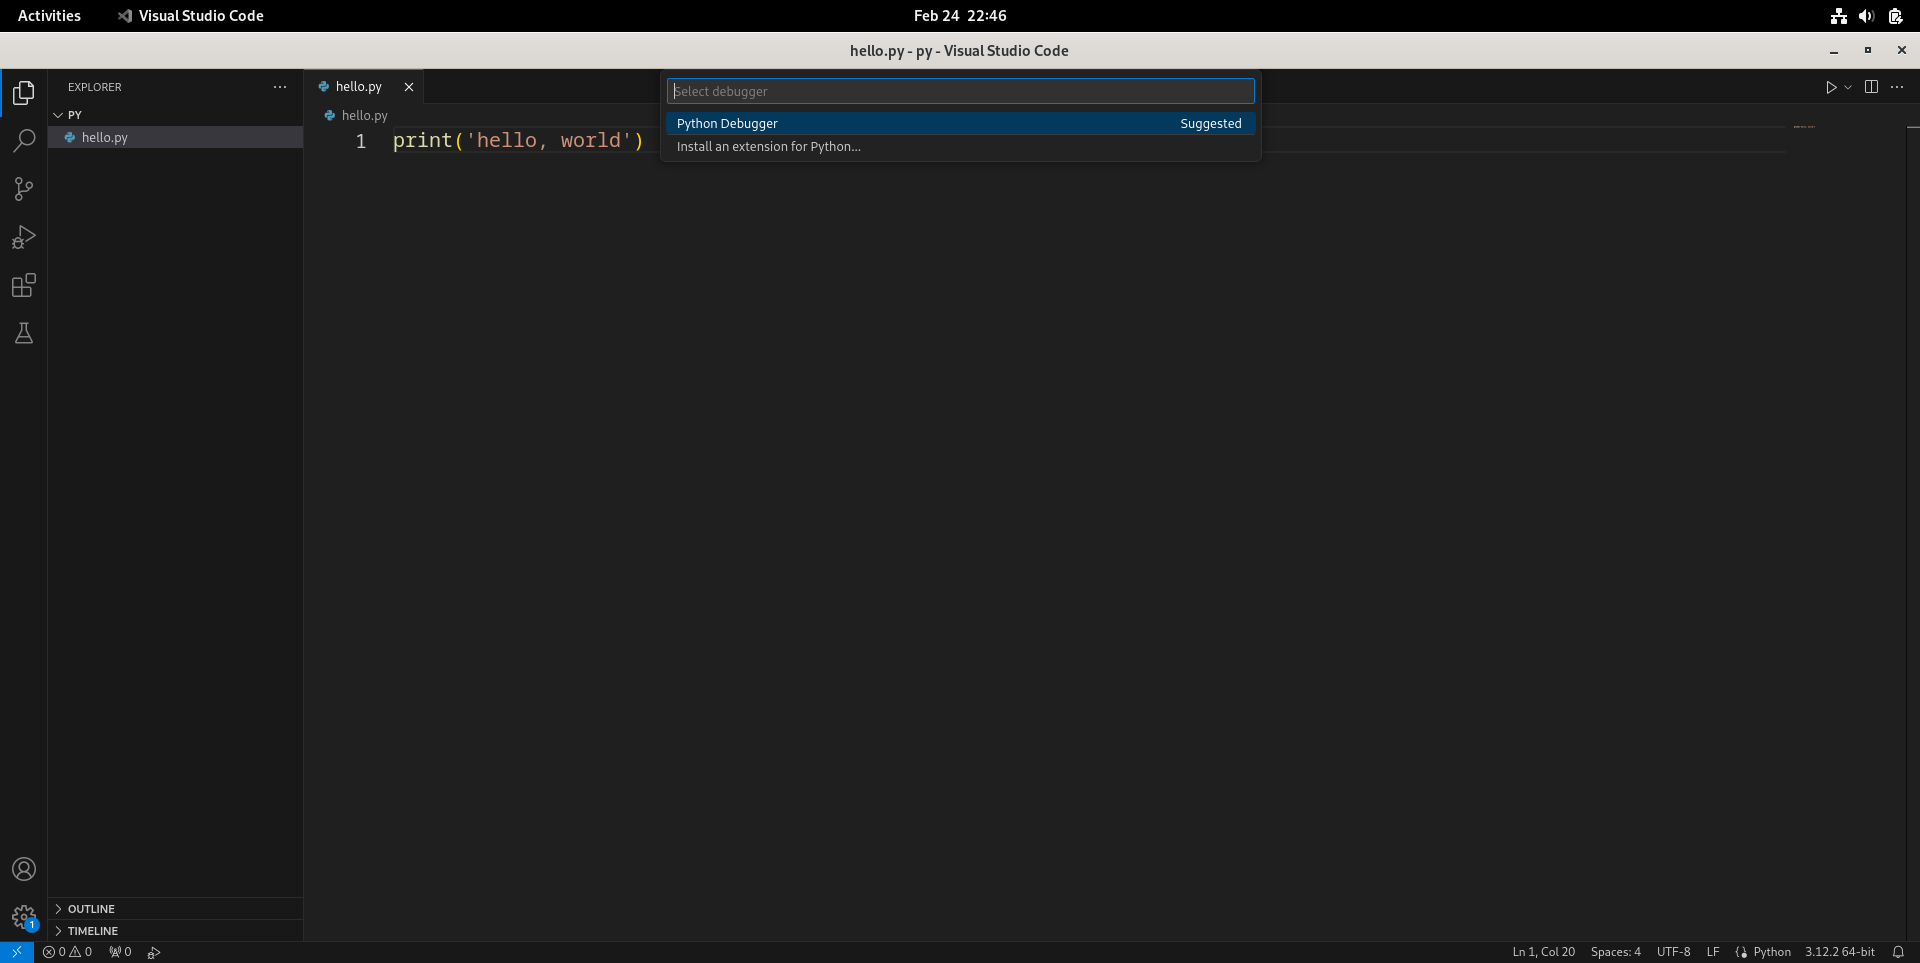
- 然后选择调试配置(Select a debug configuration),通常选择默认的第一项“Python文件”(Python File)就行。
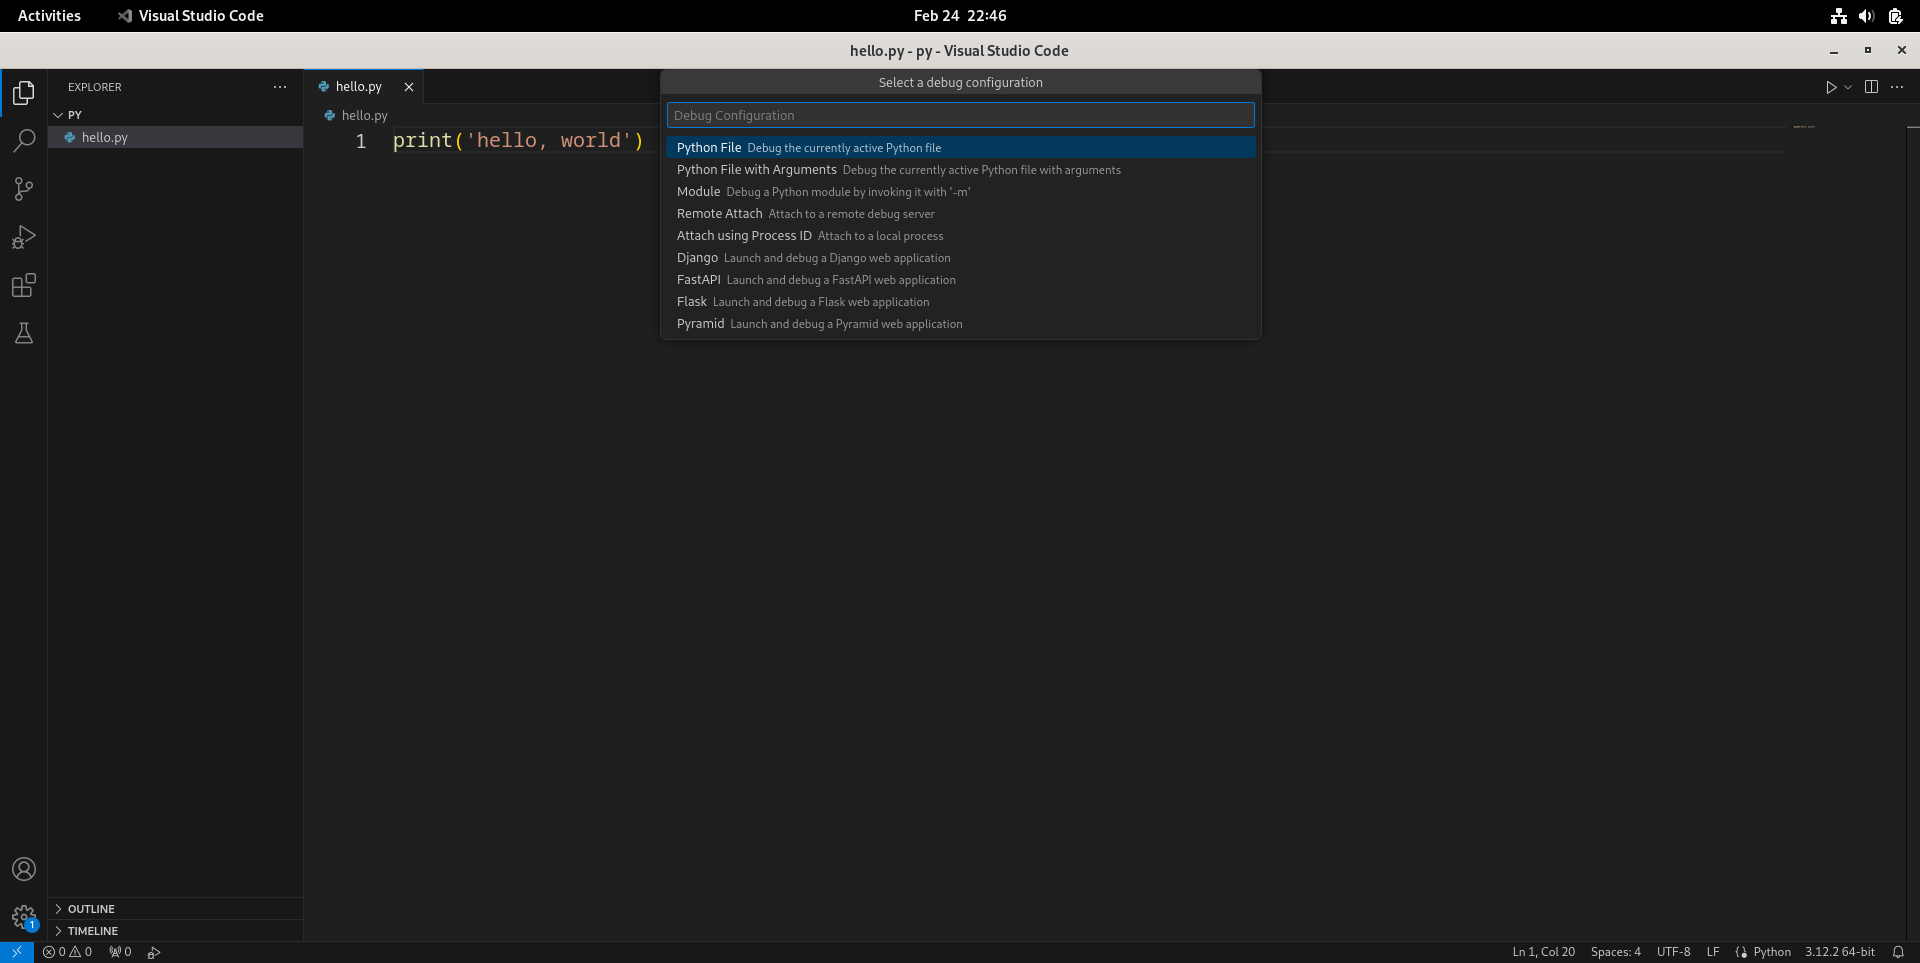
- 可以看到下方终端(Terminal)正常输出了
hello, world,但右下角Python解释器显示为/usr/local/bin/python3.12,而不是在这里提到的venv里面。点击底部栏上显示“3.12.2 64-bit”的这个地方。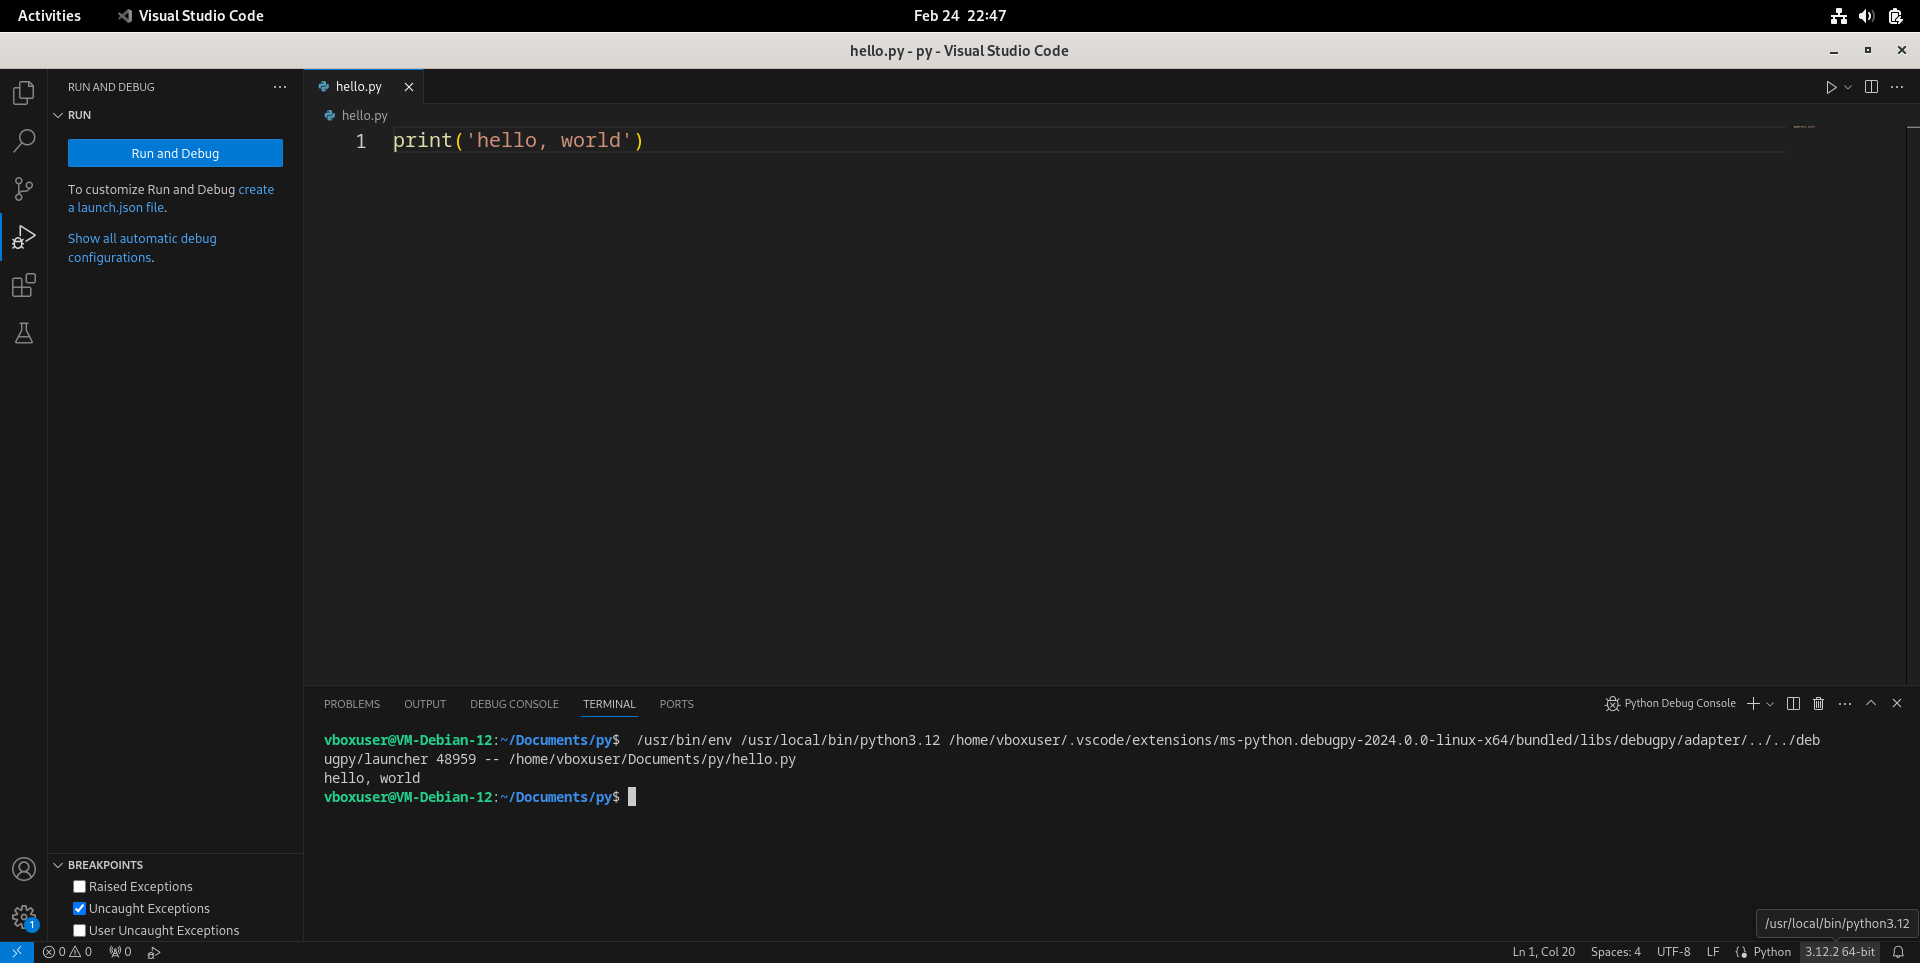
- 上方会出现选择解释器(Select Interpreter)的菜单栏,选择“Create Virtual Environment”在当前工作区创建虚拟环境。
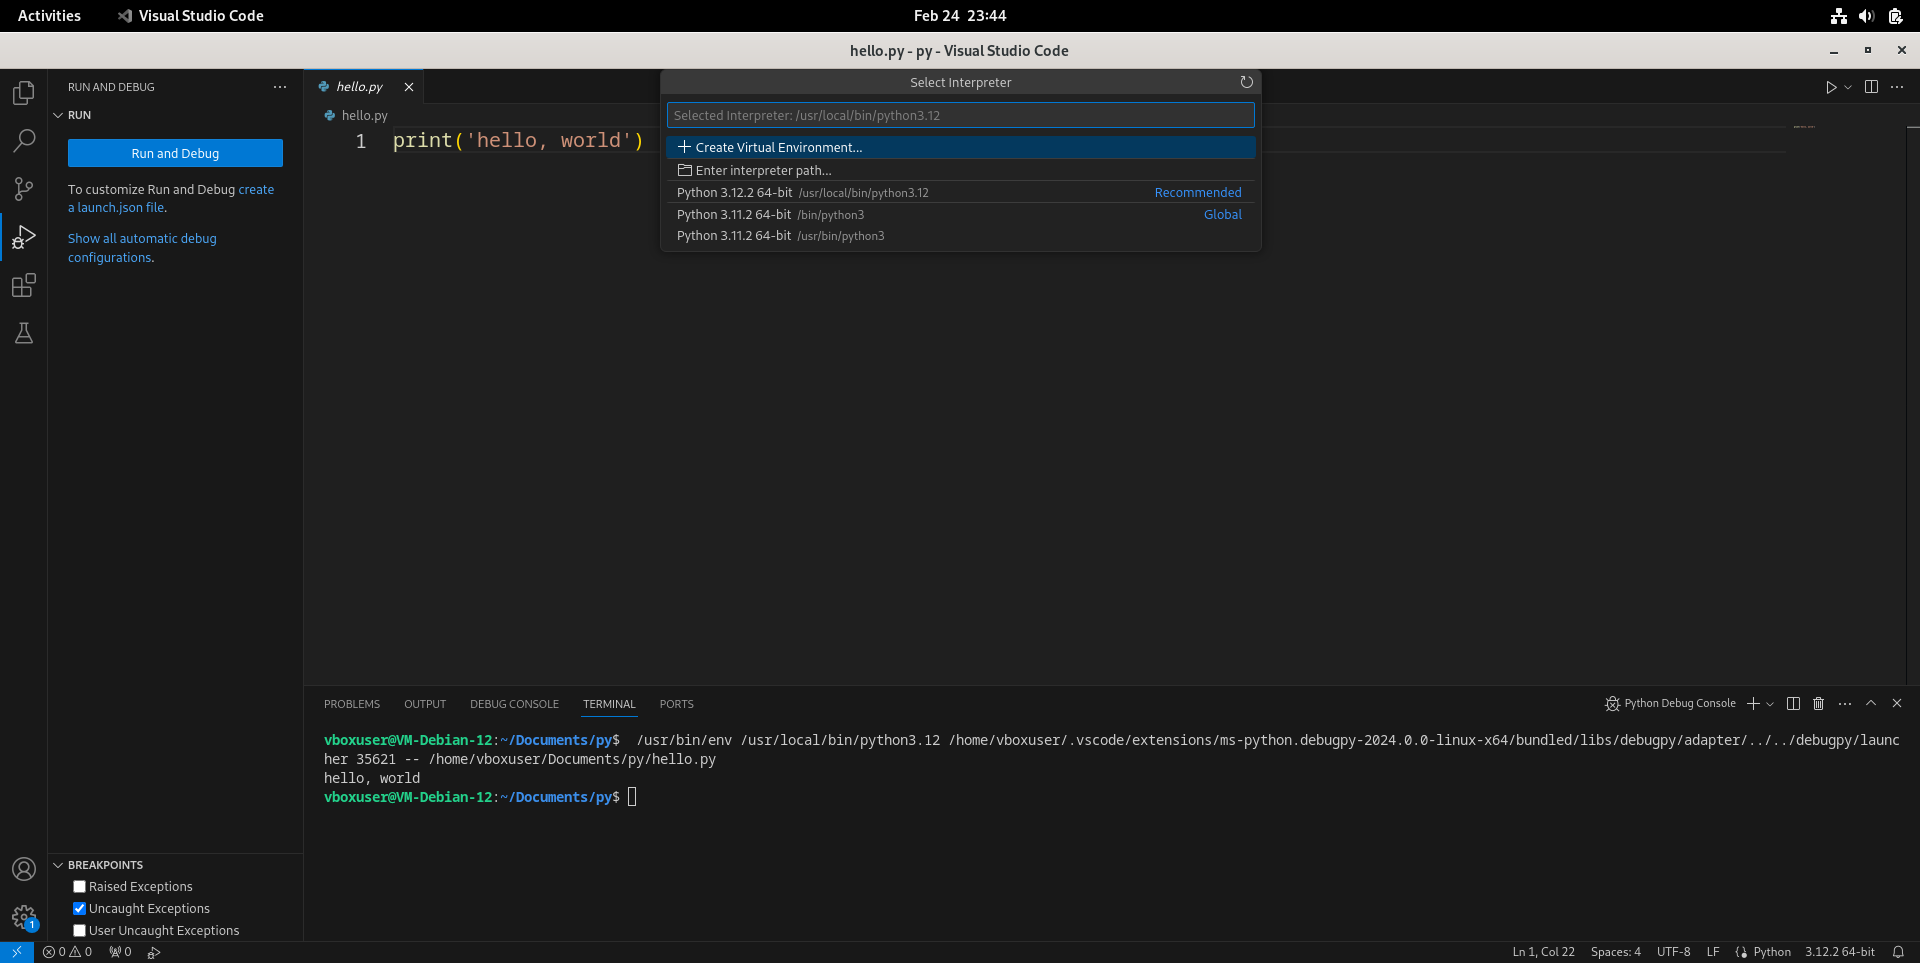
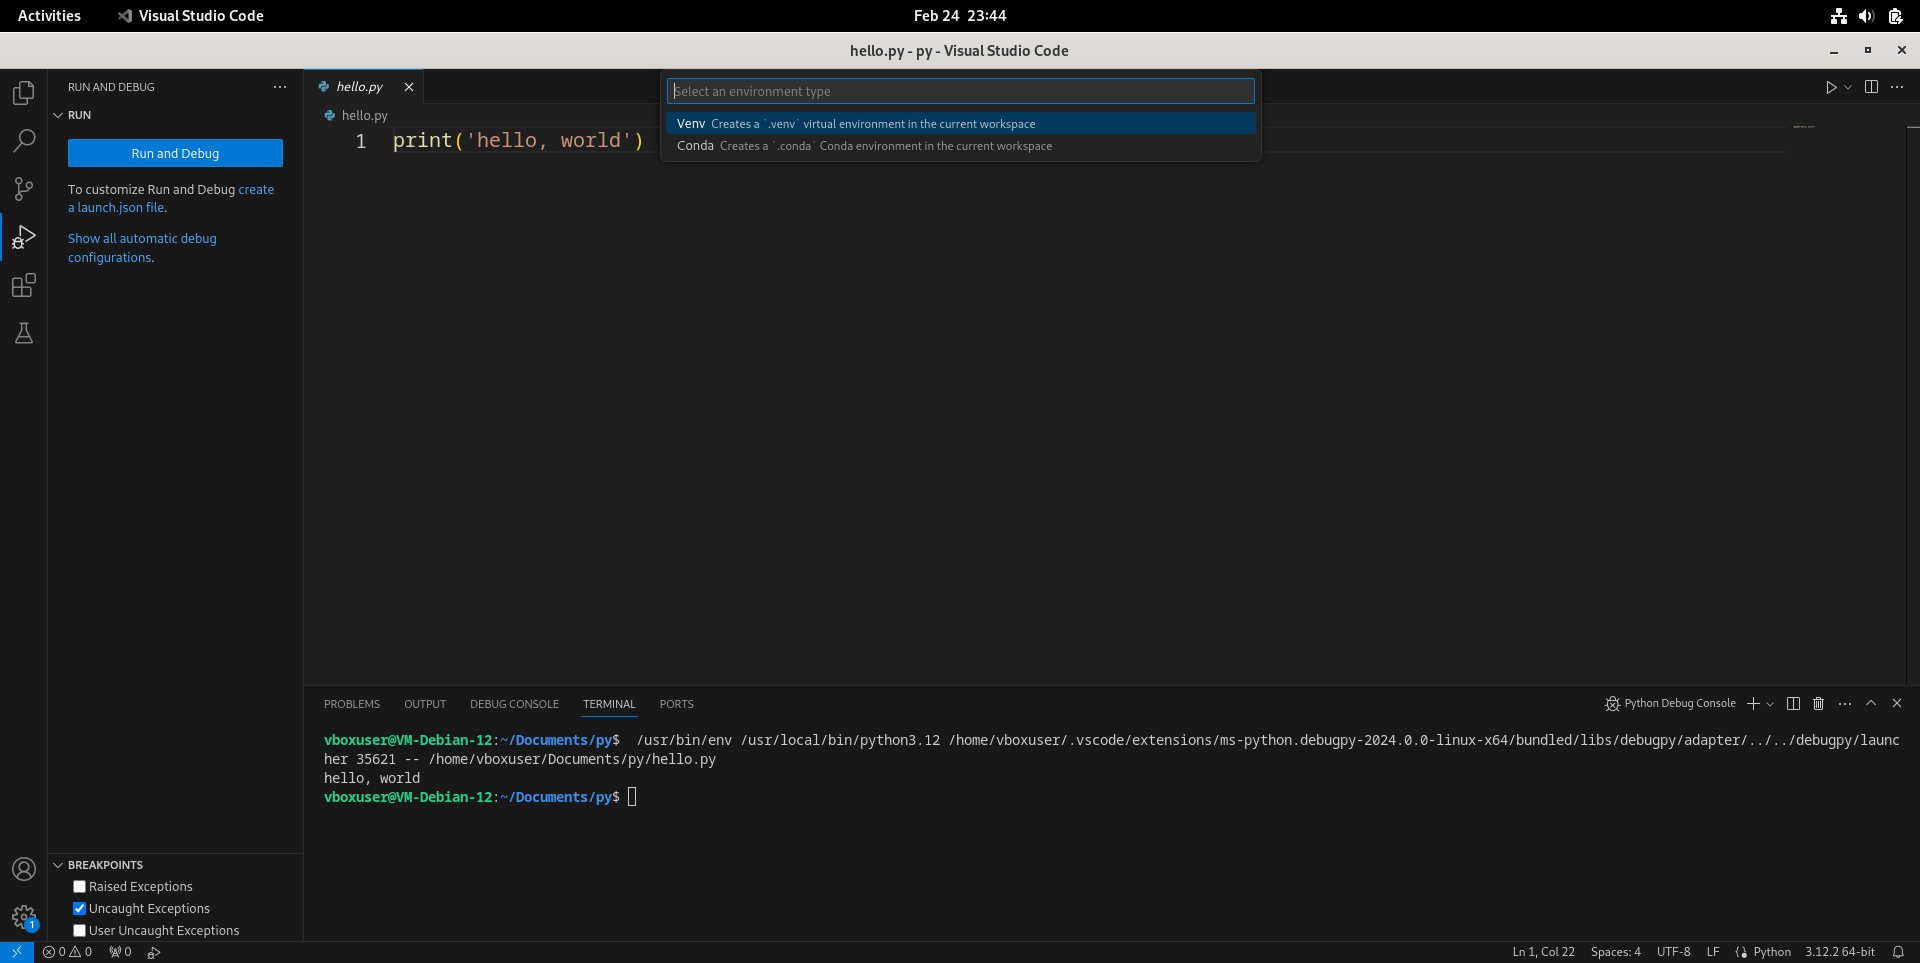
- 选择虚拟环境的类型为Venv。
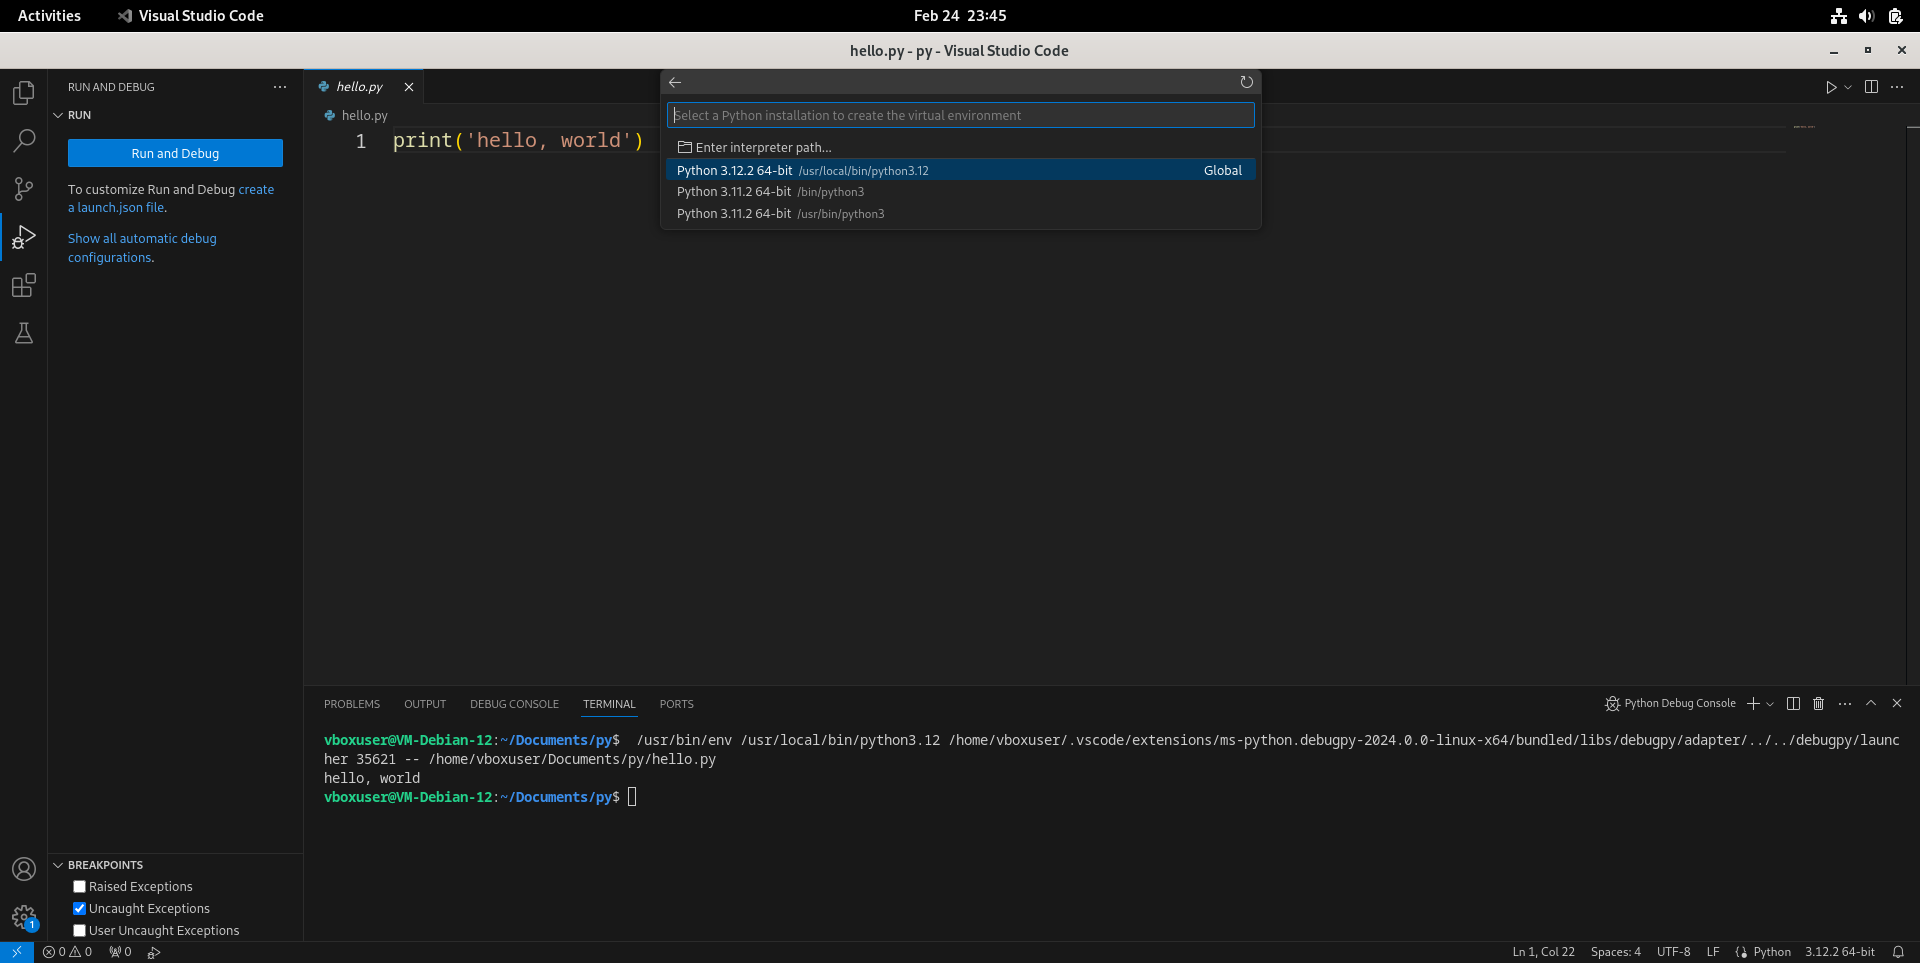
- 选择用哪个Python解释器创建虚拟环境。这里选第一项“Python 3.12.2 64-bit”。
- 等到venv虚拟环境创建完毕后,按F5再次调试,看到下方终端正常输出
hello, world,并且右下角Python解释器显示3.12.2 ('.venv': venv),则环境配置成功。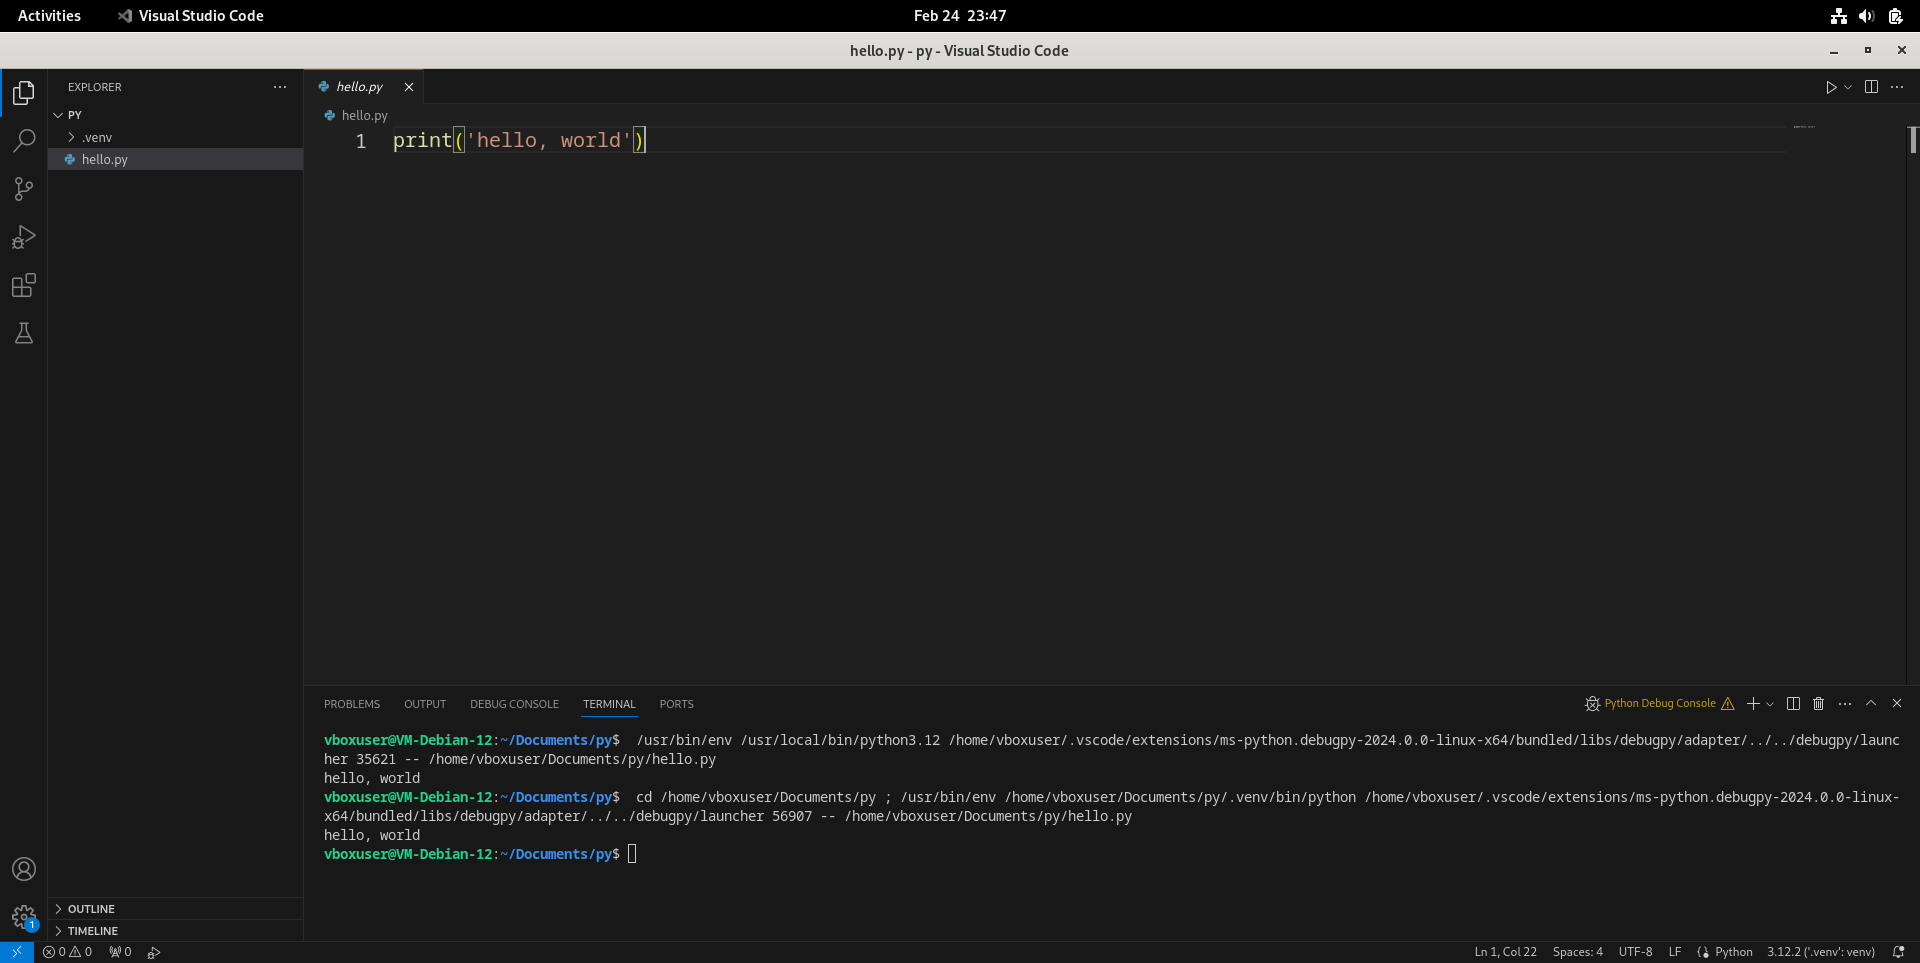
macOS
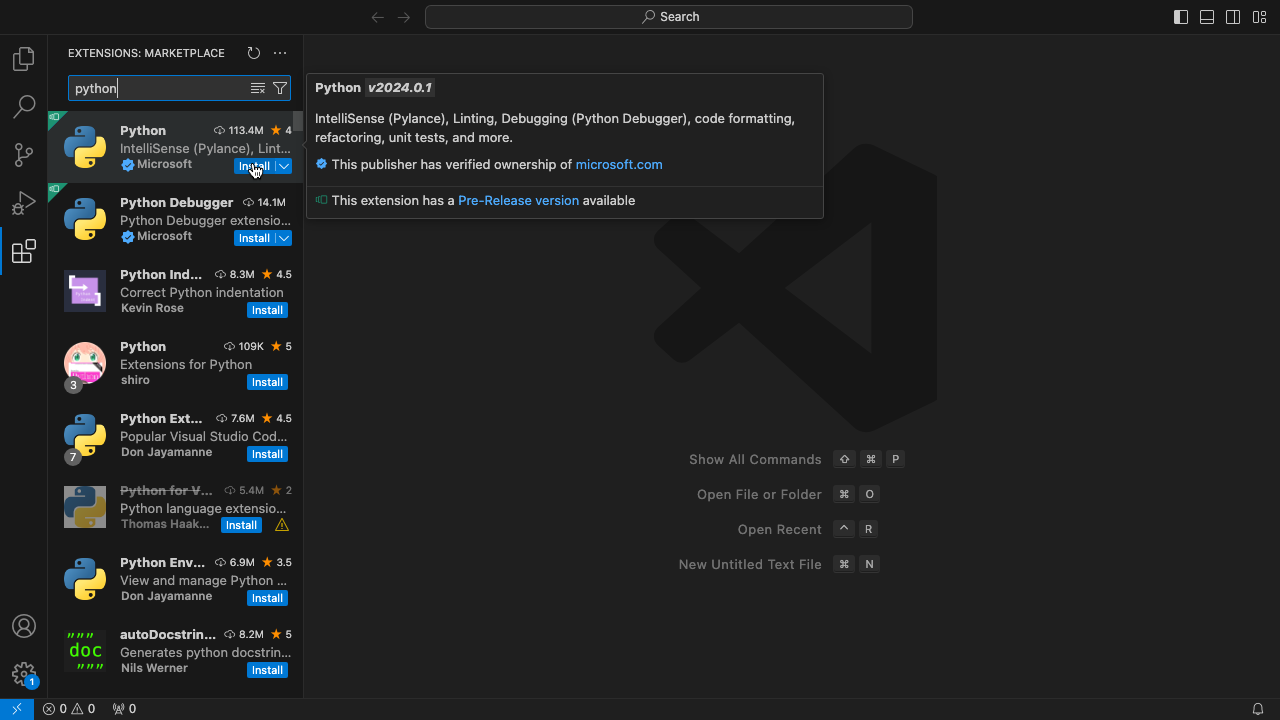
- 打开VS Code,按Cmd+Shift+X键,搜索“python”插件并点击“Install”安装。
- 按Cmd+O,选择或新建一个文件夹,作为写Python程序的工作区(workspace)。这里以
~/Documents/py为例。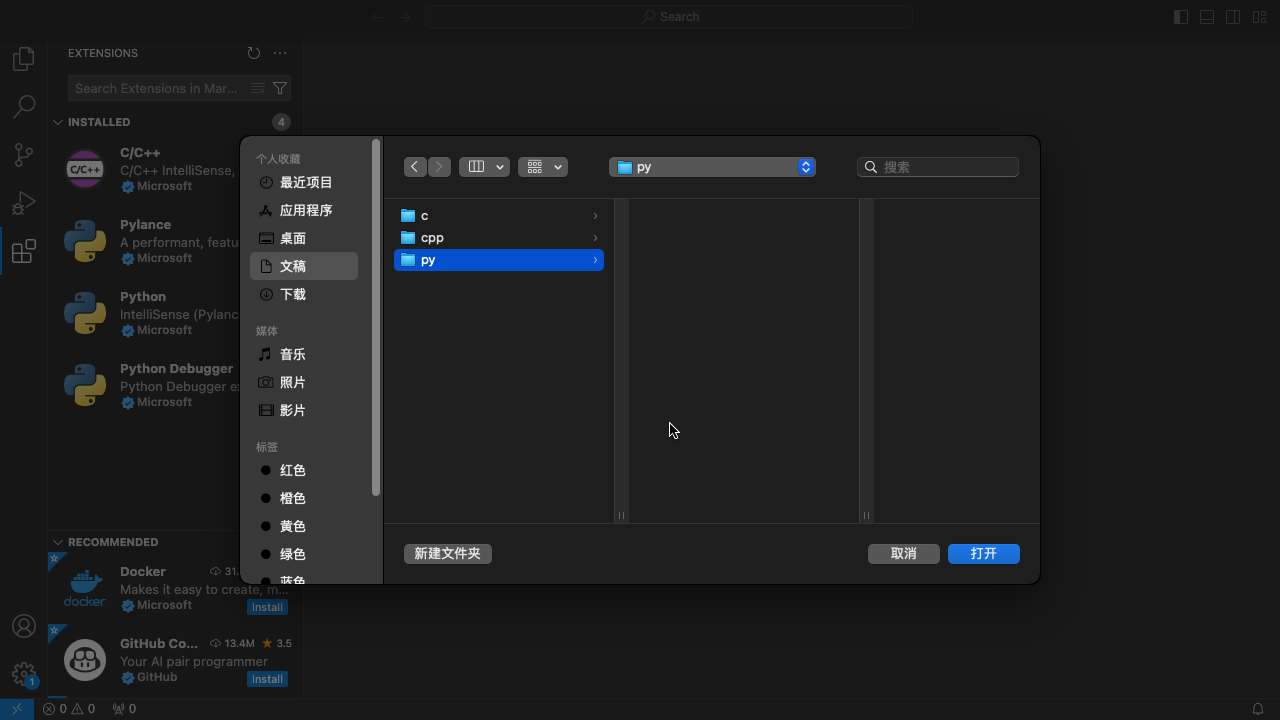
- 在工作区或其子文件夹新建一个文件
hello.py,随便写点东西,比如然后按Cmd+S保存。可以看到右下角Python解释器显示为“3.8.2 64-bit”,而不是刚才安装的3.12.2。点击这个地方。1
print("hello, world")
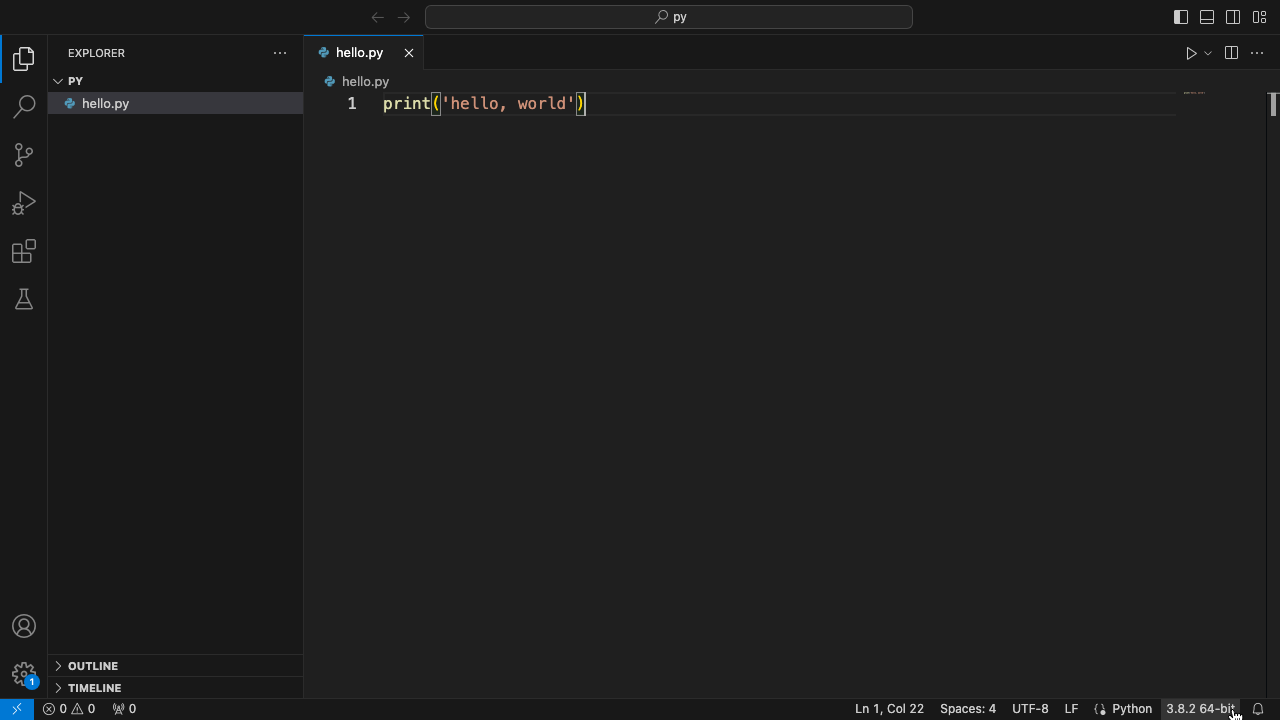
- 上方会出现选择解释器(Select Interpreter)的菜单栏,选择“Python 3.12.2 64-bit”。
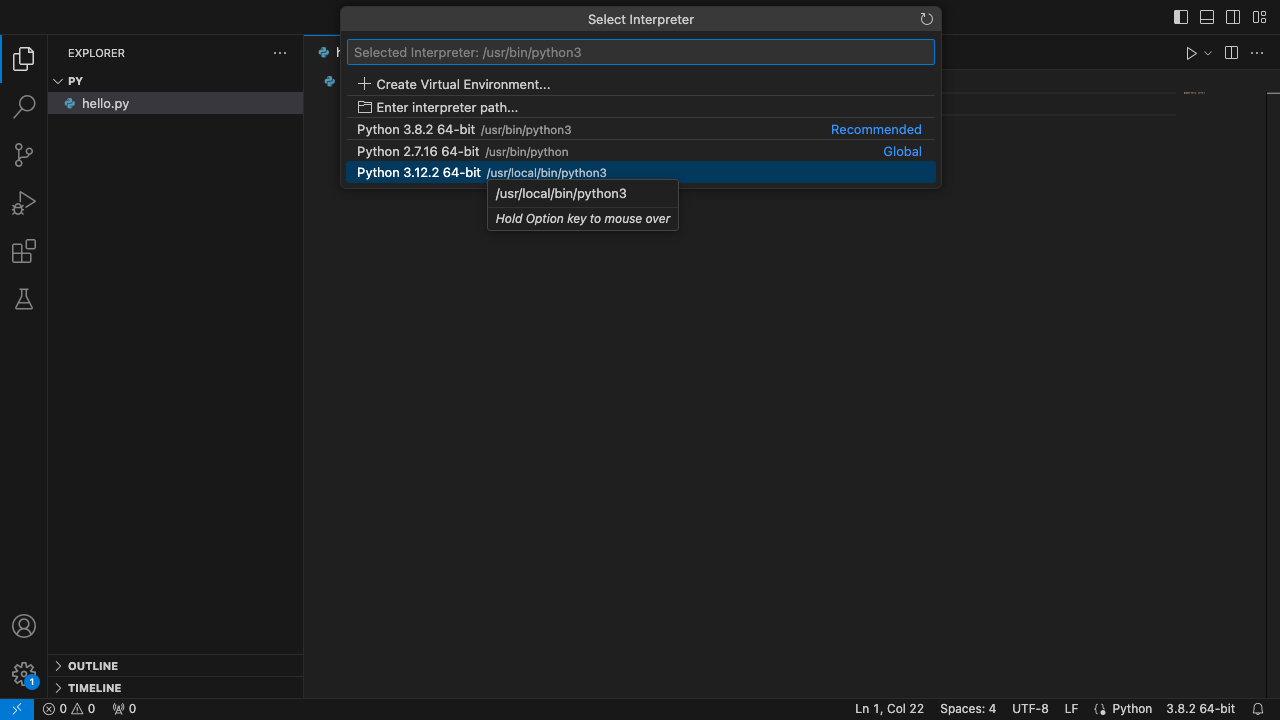
- 按F5调试程序。页面上方会让用户选择调试器(Select debugger),这里只有一项“Python Debugger”。
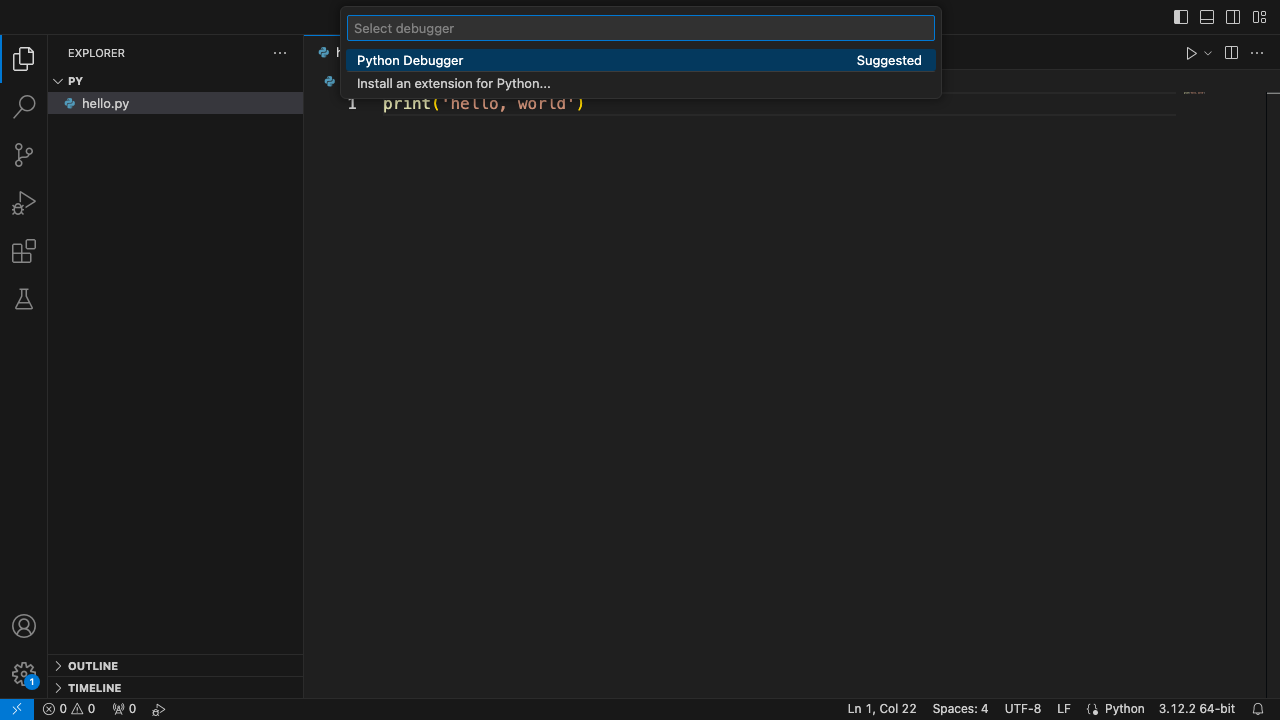
- 选择调试配置(Select a debug configuration),通常选择默认的第一项“Python文件”(Python File)就行。
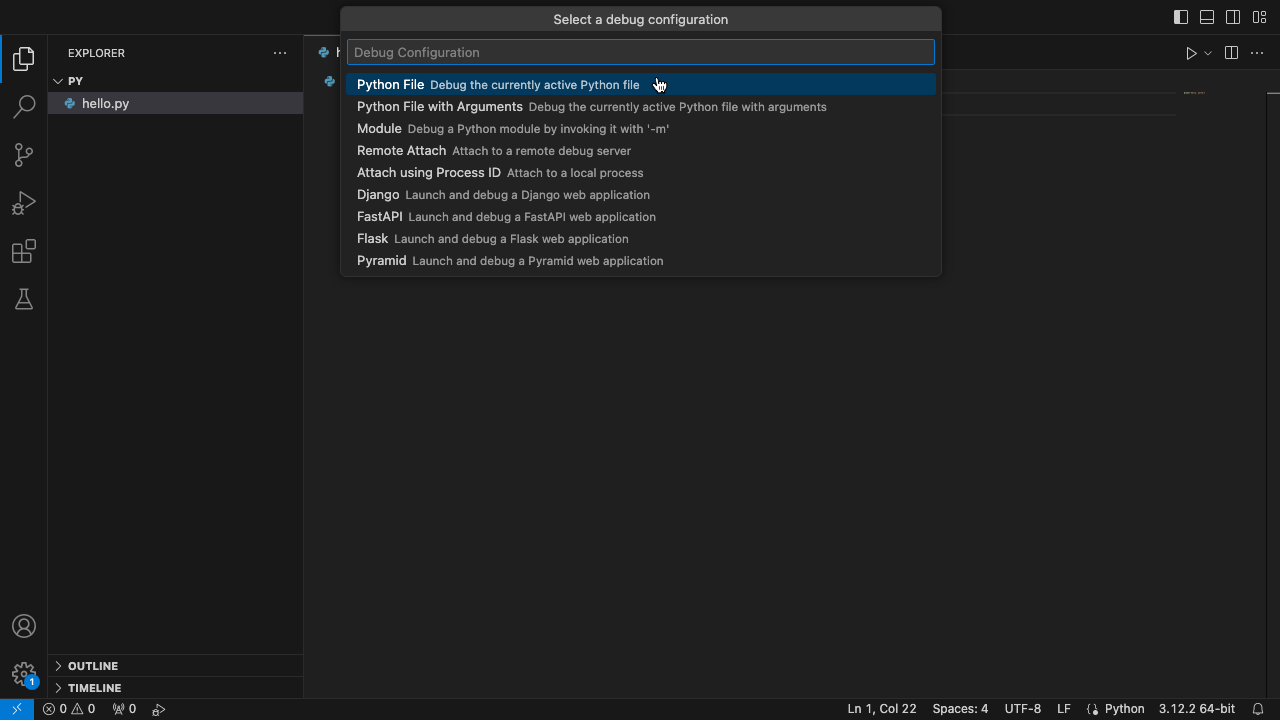
- 然后看到下方终端(Terminal)输出
hello, world,则环境配置成功。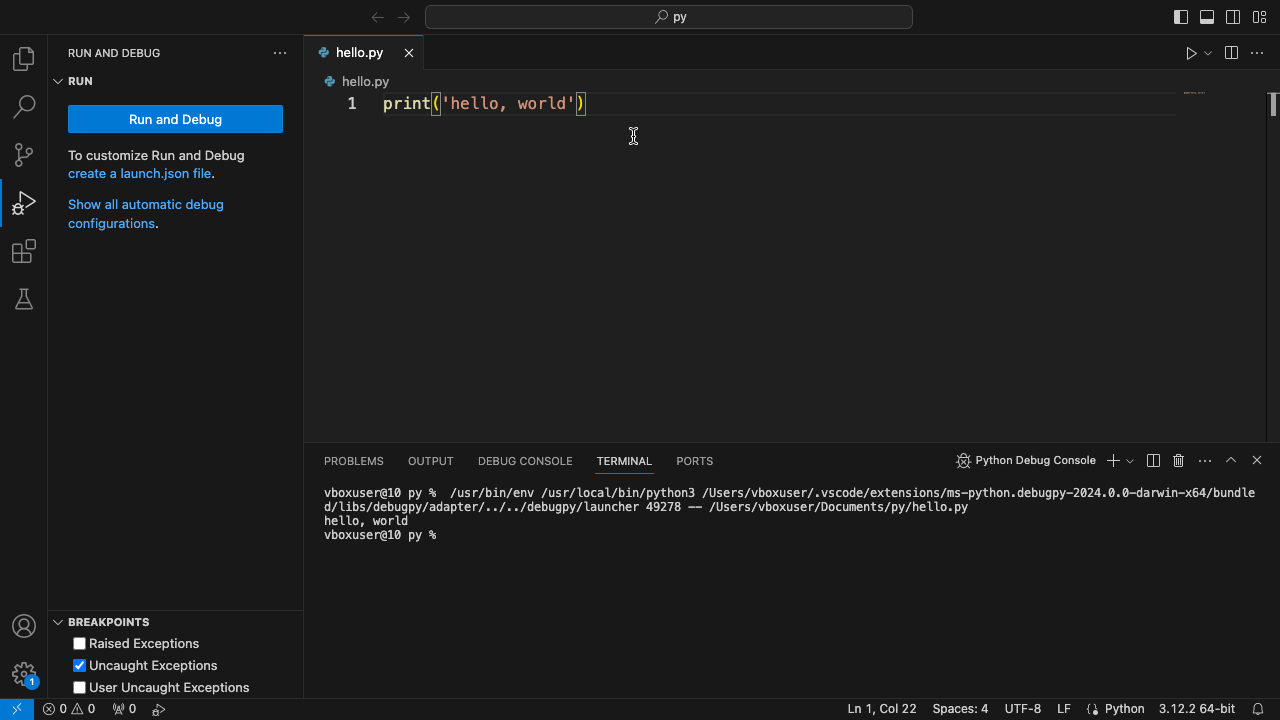
小提示
- 可以在工作区新建一个子文件夹
.vscode,在里面新建一个文件launch.json。如果安装了名为Python Debugger的插件,就写入如下内容并保存;如果没安装名为Python Debugger的插件,就写入如下内容并保存。1
2
3
4
5
6
7
8
9
10
11
12
13
14{
// Use IntelliSense to learn about possible attributes.
// Hover to view descriptions of existing attributes.
// For more information, visit: https://go.microsoft.com/fwlink/?linkid=830387
"configurations": [
{
"name": "Python Debugger: Current File",
"type": "debugpy",
"request": "launch",
"program": "${file}",
"console": "integratedTerminal",
},
],
}1
2
3
4
5
6
7
8
9
10
11
12
13
14
15{
// Use IntelliSense to learn about possible attributes.
// Hover to view descriptions of existing attributes.
// For more information, visit: https://go.microsoft.com/fwlink/?linkid=830387
"version": "0.2.0",
"configurations": [
{
"name": "Python: Current File",
"type": "python",
"request": "launch",
"program": "${file}",
"console": "integratedTerminal",
},
],
} - 如果想在外部控制台(窗口)显示输出,可以把上面
launch.json第12行的"console": "intergratedTerminal"改为"console": "externalTerminal"。如果控制台闪退,可以在最后加input()等语句,不让程序直接退出。 - 按照这样配置,工作区内Python文件的“当前工作目录”(current working directory, cwd)为
${workspaceFolder}。例如工作区目录为~/py,在~/py/foo/bar.py里有如下代码则在1
text = open('./baz.txt', 'r')
bar.py运行或调试时,这条语句会打开~/py/baz.txt。如果想在这种情况下让程序打开~/py/foo/baz.txt,就在launch.json最内层大括号里加一行(注意缩进)1
"cwd": "${fileDirname}",
- 有关路径和文件名最好没有非ASCII字符(比如中文)和空格。
词汇表
| 英文 | 中文 |
|---|---|
| configuration | 配置 |
| create | 创建 |
| debug | 调试 |
| directory | 目录 |
| extension | 插件 |
| file | 文件 |
| folder | 文件夹 |
| install | 安装 |
| interpreter | 解释器 |
| launch | 启动 |
| terminal | 终端 |
| workspace | 工作区 |